这篇文章主要讲一下如何用Tensorflow中的标准数据读取方式简单的实现对自己数据的读取操作.
主要分为以下两个步骤:(1)将自己的数据集转化为 xx.tfrecords的形式;(2):在自己的程序中读取并使用.tfrecords进行操作.
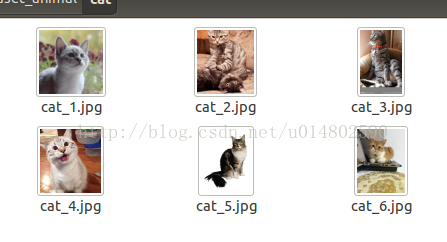
数据集转换:为了便于讲解,我们简单制作了一个数据,如下图所示:
程序:
- import tensorflow as tf
- import numpy as np
- import os
- from PIL import Image
- def _int64_feature(value):
- return tf.train.Feature(int64_list=tf.train.Int64List(value=[value]))
- def _bytes_feature(value):
- return tf.train.Feature(bytes_list=tf.train.BytesList(value=[value]))
- def img_to_tfrecord(data_path):
- rows = 256
- cols = 256
- depth = 3
- writer = tf.python_io.TFRecordWriter('test.tfrecords')
- labelfile=open("random.txt")
- lines=labelfile.readlines()
- for line in lines:
- #print line
- img_name = line.split(" ")[0]#name
- label = line.split(" ")[1]#label
- img_path = data_path+img_name
- img = Image.open(img_path)
- img = img.resize((rows,cols))
- #img_raw = img.tostring()
- img_raw = img.tobytes()
- example = tf.train.Example(features = tf.train.Features(feature = {
- 'height': _int64_feature(rows),
- 'weight': _int64_feature(cols),
- 'depth': _int64_feature(depth),
- 'image_raw': _bytes_feature(img_raw),
- 'label': _bytes_feature(label)}))
- writer.write(example.SerializeToString())
- writer.close()
- if __name__ == '__main__':
- current_dir = os.getcwd()
- data_path = current_dir + '/data/'
- #name = current_dir + '/data'
- print('Convert start')
- img_to_tfrecord(data_path)
- print('done!')
运行该段程序可以看到在dataset_tfrecord文件夹下面有test.tfrecord文件生成。
在TF的Session中调用这个生成的文件:
- #encoding=utf-8
- # 设置utf-8编码,方便在程序中加入中文注释.
- import os
- import scipy.misc
- import tensorflow as tf
- import numpy as np
- from test import *
- import matplotlib.pyplot as plt
- def read_and_decode(filename_queue):
- reader = tf.TFRecordReader()
- _, serialized_example = reader.read(filename_queue)
- features = tf.parse_single_example(serialized_example,features = {
- 'image_raw':tf.FixedLenFeature([], tf.string)})
- image = tf.decode_raw(features['image_raw'], tf.uint8)
- image = tf.reshape(image, [OUTPUT_SIZE, OUTPUT_SIZE, 3])
- image = tf.cast(image, tf.float32)
- #image = image / 255.0
- return image
- data_dir = '/home/sanyuan/dataset_animal/dataset_tfrecords/'
- filenames = [os.path.join(data_dir,'train%d.tfrecords' % ii) for ii in range(1)] #如果有多个文件,直接更改这里即可
- filename_queue = tf.train.string_input_producer(filenames)
- image = read_and_decode(filename_queue)
- with tf.Session() as sess:
- coord = tf.train.Coordinator()
- threads = tf.train.start_queue_runners(coord=coord)
- for i in xrange(2):
- img = sess.run([image])
- print(img[0].shape) # 设置batch_size等于1.每次读出来只有一张图
- plt.imshow(img[0])
- plt.show()
- coord.request_stop()
- coord.join(threads)
程序到这里就已经处理完成了,当然在decorde的过程中也是可以进行一些预处理操作的,不过建议还是在制作数据集的时候进行,TFrecord使用的是队列的方式进行读取数据,这个对于多线程操作来说还是很方便的,只需要设置好格式,每次直接读取就可以了.