前言
项目中使用了很多现成的框架,都是项目经理、架构师带来的,从来没有自己整合过!这次决定自己从零开始整合一次,以学习巩固。过程中参考很多开源框架的思路,工具类等,若有侵权,请速速联系,一定妥善处理
一:简介
前面已经把springboot+mybatis plus整合完了,也就是大名鼎鼎的ssm框架。现在新项目大多采用前后分离的开发模式,接口文档重要性不言而喻。swagger ui 是一个挺好用的接口文档生成工具。官网:https://swagger.io/
二:依赖
<!--swagger-->
<dependency>
    <groupId>io.springfox</groupId>
    <artifactId>springfox-swagger2</artifactId>
    <version>2.7.0</version>
</dependency>
<dependency>
    <groupId>io.springfox</groupId>
    <artifactId>springfox-swagger-ui</artifactId>
    <version>2.7.0</version>
</dependency>
三:配置
SwaggerConfig.java
package org.itachi.frame.core.config.web;

import io.swagger.annotations.ApiOperation;
import org.springframework.context.annotation.Bean;
import org.springframework.context.annotation.Configuration;
import springfox.documentation.builders.ApiInfoBuilder;
import springfox.documentation.builders.PathSelectors;
import springfox.documentation.builders.RequestHandlerSelectors;
import springfox.documentation.service.ApiInfo;
import springfox.documentation.service.ApiKey;
import springfox.documentation.service.Contact;
import springfox.documentation.spi.DocumentationType;
import springfox.documentation.spring.web.plugins.Docket;
import springfox.documentation.swagger2.annotations.EnableSwagger2;

import java.util.List;

import static com.google.common.collect.Lists.newArrayList;

/**
 * Swagger配置
 *
 * @author itachi
 * @date 2018-10-05 18:09
 */
@Configuration
@EnableSwagger2
public class SwaggerConfig {

    public static final String SWAGGER_SCAN_BASE_PACKAGE = "com.example.demo";
    public static final String VERSION = "1.0.0";


    @Bean
    public Docket customImplementation() {
        return new Docket(DocumentationType.SWAGGER_2)
                .apiInfo(apiInfo())
                .select()
                //包下的类,才生成接口文档
                //.apis(RequestHandlerSelectors.basePackage(SWAGGER_SCAN_BASE_PACKAGE))
                //加了ApiOperation注解的类,才生成接口文档
                .apis(RequestHandlerSelectors.withMethodAnnotation(ApiOperation.class))
                .paths(PathSelectors.any())
                .build()
                //.directModelSubstitute(org.joda.time.LocalDate.class, java.sql.Date.class)
                //.directModelSubstitute(org.joda.time.DateTime.class, java.util.Date.class)
                .securitySchemes(security());

    }

    private List<ApiKey> security() {
        return newArrayList(
                new ApiKey("token", "token", "header")
        );
    }


    ApiInfo apiInfo() {
        return new ApiInfoBuilder()
                .title("Swagger API")
                .description("This is to show api description")
                .license("Apache 2.0")
                .licenseUrl("http://www.apache.org/licenses/LICENSE-2.0.html")
                .termsOfServiceUrl("")
                .version(VERSION)
                .contact(new Contact("xxx", "", "[email protected]"))
                .build();
    }
}
四:使用
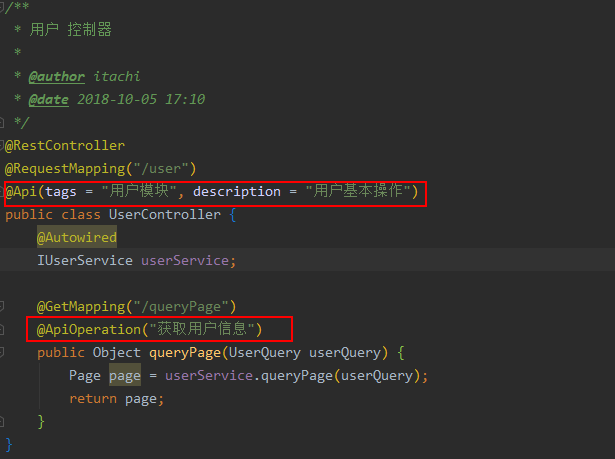
在控制器,实体添加相应的注解,便可生成api文档

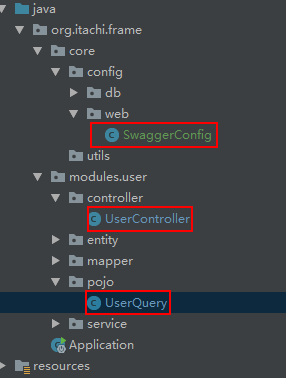
目录结构
五:测试
访问 http://localhost:8080/swagger-ui.html#/

更多注解,请参考 《swagger常用注解说明》