一、Nginx简介:
Nginx 可以在大多数 UnixLinux OS 上编译运行,并有 Windows 移植版。对于新建站点,Nginx 是一个很强大的高性能Web和反向代理服务,它具有很多非常优越的特性:在连接高并发的情况下,能够支持高达 50,000 个并发连接数的响应。 Nginx作为负载均衡服务:Nginx 既可以在内部直接支持 Rails 和 PHP 程序对外进行服务,也可以支持作为 HTTP代理服务对外进行服务。Nginx采用C进行编写,不论是系统资源开销还是CPU使用效率都比 Perlbal 要好很多。处理静态文件,索引文件以及自动索引;打开文件描述符缓冲;无缓存的反向代理加速,简单的负载均衡和容错。FastCGI,简单的负载均衡和容错。
二、Centos搭建Nginx环境搭建
1、centos安装nginx
(1) 由于nginx是由c/c++开发,所以在linux环境下需要先安装gcc的编译器
yum -y install make zlib zlib-devel gcc-c ++ libtool openssl openssl-devel(2) 安装pcre、openssl、zlib
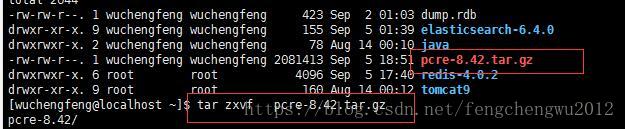
1>prce下载地址(https://sourceforge.net/projects/pcre/)
解压至指定目录(tar zxfv pcre-8.42.tar.gz)
脚本编译pcre源码: ./pcre-8.42/configure

切换到 pcre目录:cd pcre-8.42
生产.so动态库:make make install
安装成功后查看版本: pcre-config --version

2>oppssl下载地址(https://www.openssl.org/source/openssl) zlib下载地址(http://zlib.net/zlib)
解压和编译步骤和pcre一样
(3)安装nginx服务器
下载nginx安装包(http://nginx.org/en/download.html)
加压至用户目录:tar zxvf nginx-1.15.3.tar.gz
编译nginx源码:
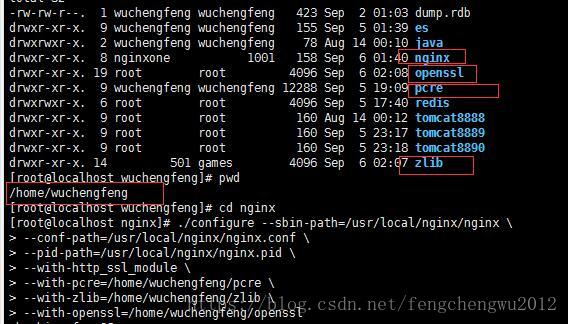
cd nginx
./configure --sbin-path=/usr/local/nginx/nginx \
--conf-path=/usr/local/nginx/nginx.conf \
--pid-path=/usr/local/nginx/nginx.pid \
--with-http_ssl_module \
--with-pcre=/home/wuchengfeng/pcre \
--with-zlib=/home/wuchengfeng/zlib \
--with-openssl=/home/wuchengfeng/openssl
安装成功后
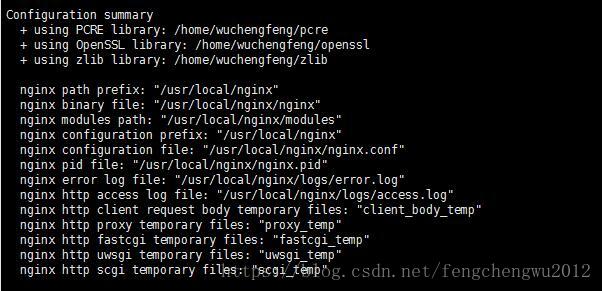
安装成功后查看版本: /usr/local/nginx/sbin/nginx -v

(4)nginx启动
配置域名指向:
1>vi /etc/hosts

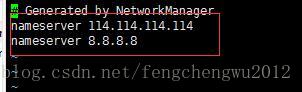
2>vi etc/resolv.conf
3>vi /etc/sysconfig/network
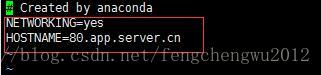
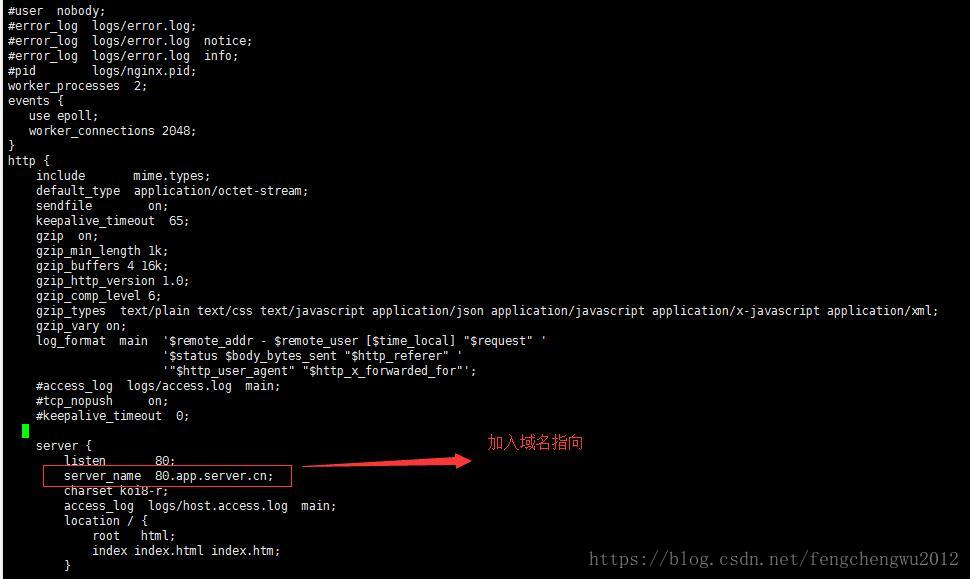
修改nginx的配置文件添加域名: vi /usr/local/nginx/conf/nginx.conf
调整一下nginx服务器入口html下的index.html文件:

测试、启动nginx服务器:
cd /usr/local/nginx/sbin
测试命令:./nginx -t

启动命令:./nginx
重新加载配置文件:./nginx -s reload
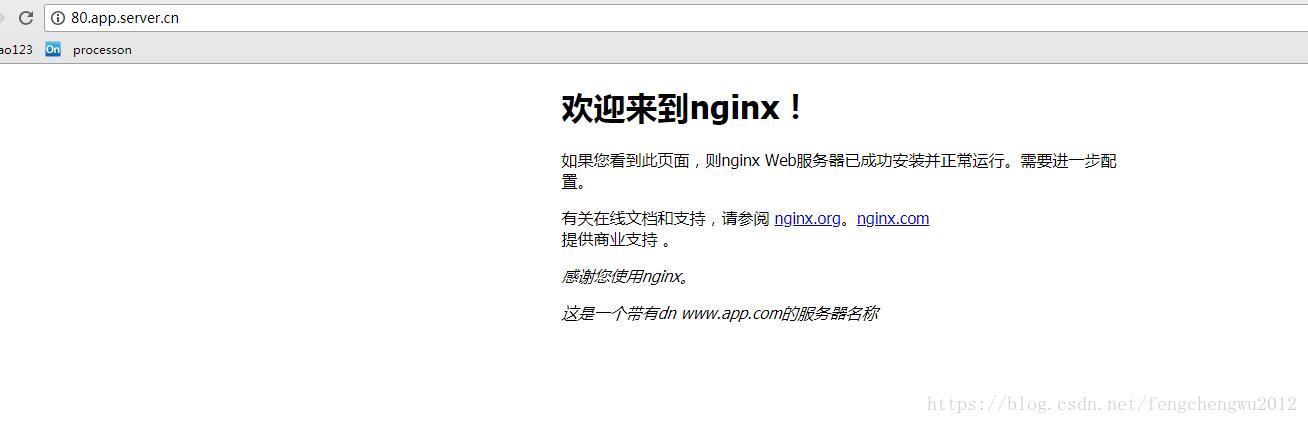
客户端域名访问测试:
关闭nginx 服务器 ./sibn/nginx -s stop
三、nginx+tomcat实现负载均衡
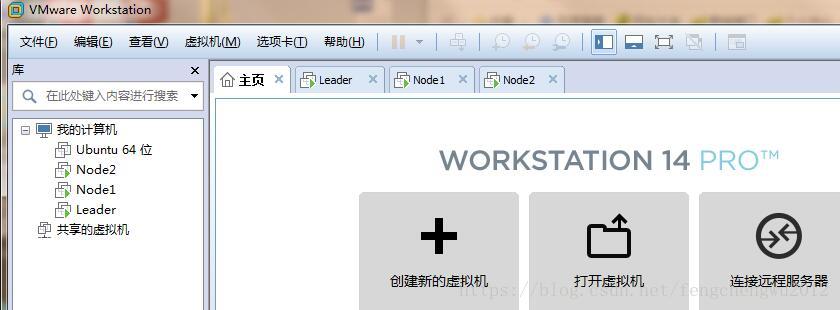
1、安装好三台centos虚拟机Leader(ip:192.168.137.130,域名:80.app.server.cn)、Node1(ip:192.168.137.133)、Node2(ip:192.168.137.134),分别在Node1和Node2上安装好tomcat,启动tomcat在Leader上配置好nginx服务器,当客户端访问Leader的域名是,先到大nginx,然后通过nginx反向代理,转发给Node1或者Node2中的一台
2、配置nginx文件
http {

    include       mime.types;
    default_type  application/octet-stream;
    sendfile        on;
    keepalive_timeout  65;
    gzip  on;
    gzip_min_length 1k;
    gzip_buffers 4 16k;
    gzip_http_version 1.0;
    gzip_comp_level 6;
    gzip_types  text/plain text/css text/javascript application/json application/javascript application/x-javascript application/xml;
    gzip_vary on;
    log_format  main  '$remote_addr - $remote_user [$time_local] "$request" '
                      '$status $body_bytes_sent "$http_referer" '
                      '"$http_user_agent" "$http_x_forwarded_for"';

  server {
        listen       80;
        server_name  80.app.server.cn;
        charset koi8-r;
        access_log  logs/host.access.log  main;
        location / {
            proxy_pass   http://server80;
            index  index.html index.htm;
        }
    }


    upstream  server80{
       server  192.168.137.133:8080;
       server  192.168.137.134:8080;
    }
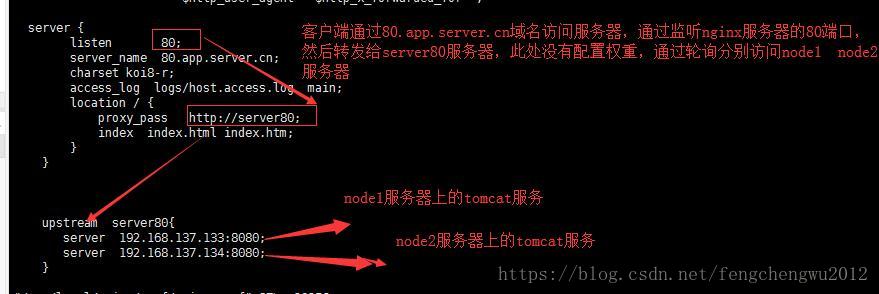
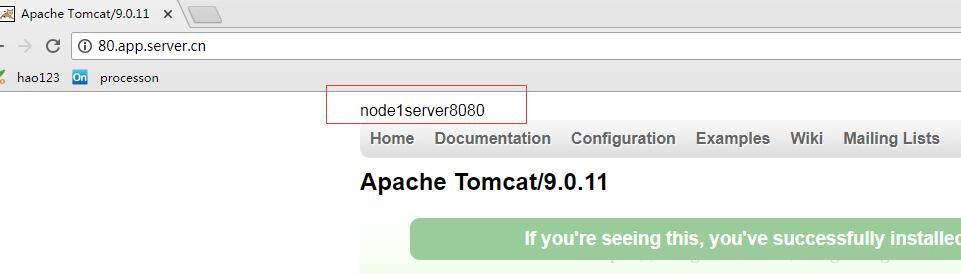
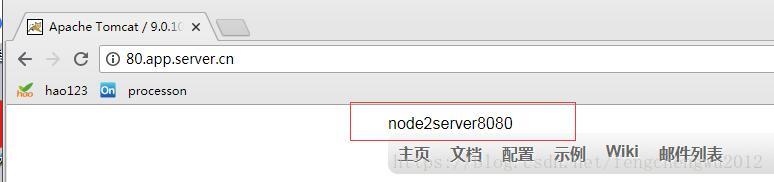
(3)客户端访问80.app.server.cn 可以实现轮询访问两台服务器
四、SpringBoot项目部署
pom.xml文件加入tomcat外部支持:
    <dependency>
          <groupId>org.springframework.boot</groupId>
          <artifactId>spring-boot-starter-tomcat</artifactId>
          <scope>provided</scope>
      </dependency>
修改启动类:
package cn.fcw.bb.webapply;
import com.github.pagehelper.PageHelper;
import org.mybatis.spring.annotation.MapperScan;
import org.springframework.boot.SpringApplication;
import org.springframework.boot.autoconfigure.SpringBootApplication;
import org.springframework.boot.builder.SpringApplicationBuilder;
import org.springframework.boot.web.servlet.support.SpringBootServletInitializer;
import org.springframework.context.annotation.Bean;
import java.util.Properties;
@SpringBootApplication(scanBasePackages = {"cn.fcw.bb.webapply"})
@MapperScan(basePackages = {"cn.fcw.bb.webapply.mapper"})
public class WebApplyApplication extends SpringBootServletInitializer {

    public static void main(String[] args) {
        SpringApplication.run(WebApplyApplication.class, args);
    }

    @Override
    protected SpringApplicationBuilder configure(SpringApplicationBuilder builder) {
        return builder.sources(SpringApplication.class);
    }

}
将项目打成war包,分别部署到node1和node2的tomcat的wepapps下面,启动tomcat即可