Java NIO(1):Buffer、Channel 和 Selector
1.Buffer
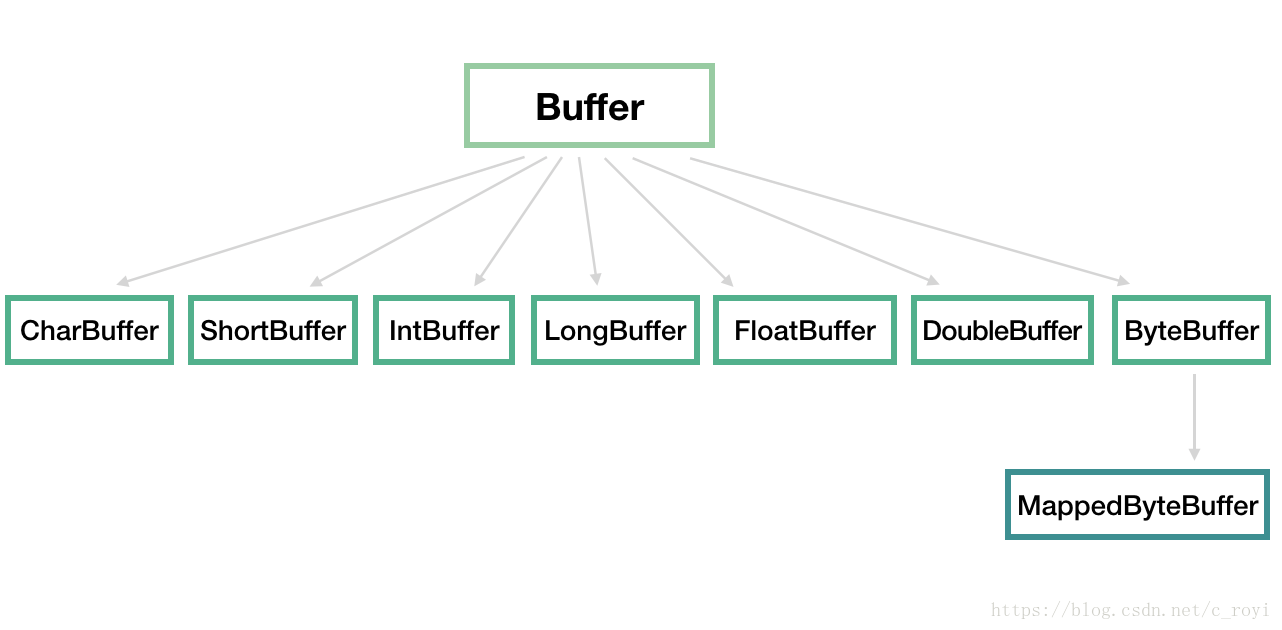
核心是最后的 ByteBuffer,前面的一大串类只是包装了一下它而已,我们使用最多的通常也是 ByteBuffer。操作 Buffer 和操作数组、类集差不多。
1.1Buffer属性
    private int position = 0;
    private int limit;
    private int capacity;//容量
    private int mark; //记录capacity的位置。
position 和 limit 是变化的,我们分别看下读和写操作下,它们是如何变化的。
position 的初始值是 0,每往 Buffer 中写入一个值,position 就自动加 1,代表下一次的写入位置。
- 读操作的时候也是类似的,每读一个值,position 就自动加 1。
- 写操作模式到读操作模式切换的时候(flip),position 都会归零,这样就可以从头开始读写了。
Limit:
- 写操作模式下,limit 代表的是最大能写入的数据,这个时候 limit 等于 capacity。
- 读模式,此时的 limit 等于 Buffer 中实际的数据大小,因为 Buffer 不一定被写满了。
1.2Buffer子类构建方式(2种)
ByteBuffer byteBuf = ByteBuffer.allocate(1024);

public static ByteBuffer wrap(byte[] array) {
    ...
}
1.3填充 Buffer
// 填充一个 byte 值
public abstract ByteBuffer put(byte b);
// 在指定位置填充一个 int 值
public abstract ByteBuffer put(int index, byte b);
// 将一个数组中的值填充进去
public final ByteBuffer put(byte[] src) {...}
public ByteBuffer put(byte[] src, int offset, int length) {...}- 注意:上述这些方法需要自己控制 Buffer 大小,不能超过 capacity,超过会抛java.nio.BufferOverflowException 异常。
对于 Buffer 来说,另一个常见的操作中就是,我们要将来自 Channel 的数据填充到 Buffer 中,在系统层面上,这个操作我们称为读操作,因为数据是从外部(文件或网络等)读到内存中。
int num = channel.read(buf);上述方法会返回从 Channel 中读入到 Buffer 的数据大小。
1.4提取Buffer中的值
首先调用 Buffer 的 flip() 方法,可以从写入模式切换到读取模式。其实这个方法也就是设置了一下 position 和 limit 值罢了。
public final Buffer flip() {
    limit = position; // 将 limit 设置为实际写入的数据数量
    position = 0; // 重置 position 为 0
    mark = -1; // mark 之后再说
    return this;
}
Buffer的方法
// 根据 position 来获取数据
public abstract byte get();
// 获取指定位置的数据
public abstract byte get(int index);
// 将 Buffer 中的数据写入到数组中
public ByteBuffer get(byte[] dst)
附一个经常使用的方法:
new String(buffer.array()).trim();常用函数:
1.mark()
//用于临时保存 position 的值,每次调用 mark() 方法都会将 mark 设值为当前的 position,便于后续需要的时候使用。
public final Buffer mark() {
    mark = position;
    return this;
}
考虑以下场景,我们在 position 为 5 的时候,先 mark() 一下,然后继续往下读,读到第 10 的时候,我想重新回到 position 为 5 的地方重新来一遍,那只要调一下 reset() 方法,position 就回到 5 了。
2.reset()
public final Buffer reset() {
    int m = mark;
    if (m < 0)
        throw new InvalidMarkException();
    position = m;
    return this;
}
3.rewind():
//会重置 position 为 0,通常用于重新从头读写 Buffer。
public final Buffer rewind() {
    position = 0;
    mark = -1;
    return this;
}
4.clear():
//有点重置 Buffer 的意思,相当于重新实例化了一样。
public final Buffer clear() {
    position = 0;
    limit = capacity;
    mark = -1;
    return this;
}
2.Channel
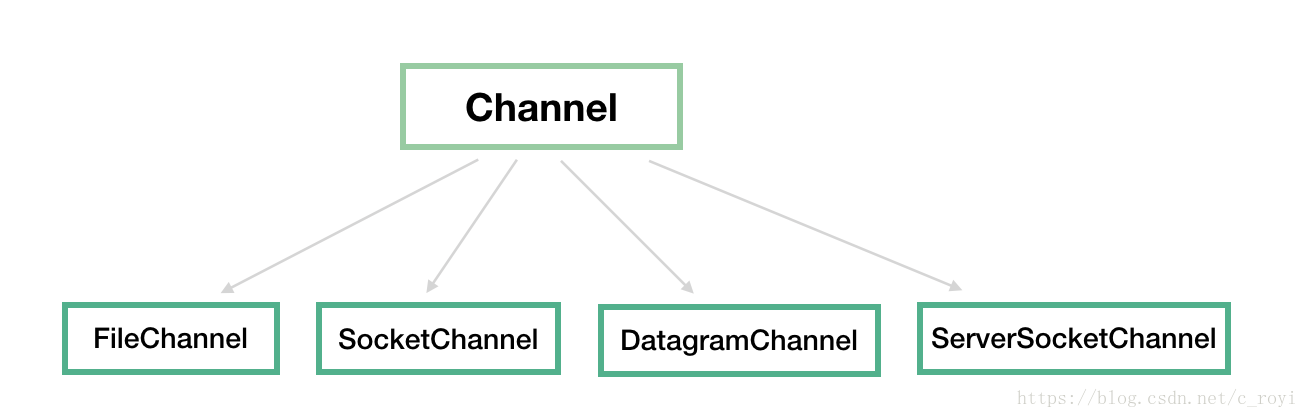
- FileChannel:文件通道,用于文件的读和写
- DatagramChannel:用于 UDP 连接的接收和发送
- SocketChannel:把它理解为 TCP 连接通道,简单理解就是 TCP 客户端
- ServerSocketChannel:TCP 对应的服务端,用于监听某个端口进来的请求

2.1FileChannel
这里算是简单介绍下常用的操作
//初始化:
FileInputStream inputStream = new FileInputStream(new File("/data.txt"));
FileChannel fileChannel = inputStream.getChannel();
//当然了,我们也可以从 RandomAccessFile#getChannel 来得到 FileChannel。

//读取文件内容:
ByteBuffer buffer = ByteBuffer.allocate(1024);
int num = fileChannel.read(buffer);

//写入文件内容:
ByteBuffer buffer = ByteBuffer.allocate(1024);
buffer.put("随机写入一些内容到 Buffer 中".getBytes());
// Buffer 切换为读模式
buffer.flip();
while(buffer.hasRemaining()) {
    // 将 Buffer 中的内容写入文件
    fileChannel.write(buffer);
}
2.2SocketChannel
可以将 SocketChannel 理解成一个 TCP 客户端。虽然这么理解有点狭隘,因为我们在介绍 ServerSocketChannel 的时候会看到另一种使用方式。
//打开一个 TCP 连接:
SocketChannel socketChannel = SocketChannel.open(new InetSocketAddress("url", 80));
当然了,上面的这行代码等价于下面的两行:

// 打开一个通道
SocketChannel socketChannel = SocketChannel.open();
// 发起连接
socketChannel.connect(new InetSocketAddress("https://www.javadoop.com", 80));
SocketChannel 的读写和 FileChannel 没什么区别,就是操作缓冲区。

// 读取数据
socketChannel.read(buffer);

// 写入数据到网络连接中
while(buffer.hasRemaining()) {
    socketChannel.write(buffer);
}
2.3ServerSocketChannel
之前说 SocketChannel 是 TCP 客户端,这里说的 ServerSocketChannel 就是对应的服务端。
ServerSocketChannel 用于监听机器端口,管理从这个端口进来的 TCP 连接。
// 实例化
ServerSocketChannel serverSocketChannel = ServerSocketChannel.open();
// 监听 8080 端口
serverSocketChannel.socket().bind(new InetSocketAddress(8080));

while (true) {
    // 一旦有一个 TCP 连接进来,就对应创建一个 SocketChannel 进行处理
    SocketChannel socketChannel = serverSocketChannel.accept();
}
这里我们可以看到 SocketChannel 的第二个实例化方式
到这里,我们应该能理解 SocketChannel 了,它不仅仅是 TCP 客户端,它代表的是一个网络通道,可读可写。
ServerSocketChannel 不和 Buffer 打交道了,因为它并不实际处理数据,它一旦接收到请求后,实例化 SocketChannel,之后在这个连接通道上的数据传递它就不管了,因为它需要继续监听端口,等待下一个连接。
2.4DatagramChannel
UDP 和 TCP 不一样,DatagramChannel 一个类处理了服务端和客户端。
- UDP 是面向无连接的,不需要和对方握手,不需要通知对方,就可以直接将数据包投出去,至于能不能送达,它是不知道的
//监听端口:

DatagramChannel channel = DatagramChannel.open();
channel.socket().bind(new InetSocketAddress(9090));
ByteBuffer buf = ByteBuffer.allocate(48);

channel.receive(buf);
//发送数据:

String newData = "New String to write to file..."
                    + System.currentTimeMillis();

ByteBuffer buf = ByteBuffer.allocate(48);
buf.put(newData.getBytes());
buf.flip();
int bytesSent = channel.send(buf, new InetSocketAddress("url", 80));
3.Selector
Selector 建立在非阻塞的基础之上,用于实现一个线程管理多个 Channel。FileChannel 不支持非阻塞,我们这里讨论最常见的 SocketChannel 和 ServerSocketChannel。
//开启Selector
Selector selector = Selector.open();
// 将通道设置为非阻塞模式,因为默认都是阻塞模式的
channel.configureBlocking(false);
// 注册
SelectionKey key = channel.register(selector, SelectionKey.OP_READ);
register 方法的第二个 int 型参数(使用二进制的标记位)用于表明需要监听哪些感兴趣的事件,共以下四种事件:
SelectionKey.OP_READ 对应 00000001,通道中有数据可以进行读取
SelectionKey.OP_WRITE 对应 00000100,可以往通道中写入数据
SelectionKey.OP_CONNECT 对应 00001000,成功建立 TCP 连接
SelectionKey.OP_ACCEPT 对应 00010000,接受 TCP 连接
Selector selector = Selector.open();

channel.configureBlocking(false);

SelectionKey key = channel.register(selector, SelectionKey.OP_READ);

while(true) {
  // 判断是否有事件准备好
  int readyChannels = selector.select();
  if(readyChannels == 0) continue;

  // 遍历
  Set<SelectionKey> selectedKeys = selector.selectedKeys();
  Iterator<SelectionKey> keyIterator = selectedKeys.iterator();
  while(keyIterator.hasNext()) {
    SelectionKey key = keyIterator.next();

    if(key.isAcceptable()) {
        // a connection was accepted by a ServerSocketChannel.

    } else if (key.isConnectable()) {
        // a connection was established with a remote server.

    } else if (key.isReadable()) {
        // a channel is ready for reading

    } else if (key.isWritable()) {
        // a channel is ready for writing
    }

    keyIterator.remove();
  }
}
对于 Selector,我们还需要非常熟悉以下几个方法:
select()
- 调用此方法,会将上次 select 之后的准备好的 channel 对应的 SelectionKey 复制到 selected set 中。如果没有任何通道准备好,这个方法会阻塞,直到至少有一个通道准备好。
selectNow()
- 功能和 select 一样,区别在于如果没有准备好的通道,那么此方法会立即返回 0。
select(long timeout)
- 看了前面两个,这个应该很好理解了,如果没有通道准备好,此方法会等待一会
wakeup()
- 这个方法是用来唤醒等待在 select() 和 select(timeout) 上的线程的。如果 wakeup()
先被调用,此时没有线程在 select 上阻塞,那么之后的一个 select() 或 select(timeout)会立即返回,而不会阻塞,当然,它只会作用一次。