高可用架构由两个核心部分组成,一个是心跳检测,判断服务器是否正常运行;一个是资源转移,用来将公共资源在正常服务器和故障服务器之间搬动。两个结合起来使用,可以实现对高可用架构的自动管理。
整个运行模式就是心跳检测不断的在网络中检测各个指定的设备是否能够正常响应,如果一旦发生设备故障,就由资源转移功能进行应用的切换,以继续提供服务。
corosync提供集群的信息层(messaging layer)的功能,传递心跳信息和集群事务信息,多台机器之间通过组播的方式监测心跳
pacemaker工作在资源分配层,提供资源管理器的功能,并以crmsh这个资源配置的命令接口来配置资源
心跳检测是用来检测服务器是否还在提供服务,只要出现异常不能提供服务了,就认为它挂掉了。
当检测出服务器挂掉之后,就要对服务资源进行转移。
CoroSync是运行于心跳层的开源软件。
PaceMaker是运行于资源转移层的开源软件。
使用corosync监控心跳,pacemaker时先资源转移,crmsh实现集群资源配置
使用fence检查节点健康状况,实行跳电保护
一、Haproxy
server1:172.25.53.2
server2:172.25.53.3
[root@server2 ~]# cd /mnt/
[root@server2 mnt]# ls
 haproxy-1.6.11.tar.gz
[root@server2 mnt]# yum install -y rpm-build     安装rpm包制作工具
[root@server2 mnt]# rpmbuild -tb haproxy-1.6.11.tar.gz 制作rpm包
[root@server2 ~]# cd rpmbuild/RPMS/x86_64/
[root@server2 x86_64]# ls
haproxy-1.6.11-1.x86_64.rpm
[root@server2 x86_64]# rpm -ivh haproxy-1.6.11-1.x86_64.rpm
Preparing...                ########################################### [100%]
   1:haproxy                ########################################### [100%]
[root@server2 x86_64]# ls
haproxy-1.6.11-1.x86_64.rpm           所制作的rpm包
[root@server2 x86_64]# rpm -qpl haproxy-1.6.11-1.x86_64.rpm
##查看安装haproxy会生成的文件, 没有主配置文件, 需要将压缩包解压获取
[root@server2 x86_64]# cd
[root@server2 ~]# ls
anaconda-ks.cfg     nginx-1.10.1.tar.gz     nginx-sticky-module-ng.tar.gz
install.log         nginx-1.14.0            rpmbuild
install.log.syslog  nginx-1.14.0.tar.gz
nginx-1.10.1        nginx-sticky-module-ng
[root@server2 ~]# cd /mnt/
[root@server2 mnt]# ls
crmsh-1.2.6-0.rc2.2.1.x86_64.rpm  haproxy-1.6.11.tar.gz
[root@server2 mnt]# tar zxf haproxy-1.6.11.tar.gz
[root@server2 mnt]# ls
crmsh-1.2.6-0.rc2.2.1.x86_64.rpm  haproxy-1.6.11  haproxy-1.6.11.tar.gz
[root@server2 mnt]# cd haproxy-1.6.11
[root@server2 haproxy-1.6.11]# ls
CHANGELOG     doc       include      Makefile  src      VERDATE
contrib       ebtree    LICENSE      README    SUBVERS  VERSION
CONTRIBUTING  examples  MAINTAINERS  ROADMAP   tests
[root@server2 haproxy-1.6.11]# find -name *.spec   存在.spec文件, 才可以制作rpm包
./examples/haproxy.spec
[root@server2 haproxy-1.6.11]# cd examples/
[root@server2 examples]# ls
acl-content-sw.cfg     debug2html    init.haproxy
auth.cfg               debugfind     option-http_proxy.cfg
check                  errorfiles    seamless_reload.txt
check.conf             haproxy.init  ssl.cfg
content-sw-sample.cfg  haproxy.spec  stats_haproxy.sh
debug2ansi             haproxy.vim   transparent_proxy.cfg
[root@server2 examples]# cp content-sw-sample.cfg /etc/haproxy/haproxy.cfg

##将配置文件模板复制到 /etc/haproxy/haproxy.cfg
##因为在haproxy启动脚本中读取的配置文件是/etc/haproxy/haproxy.cfg
##所以起的名字要一致
[root@server2 examples]# cd /etc/haproxy/
[root@server2 haproxy]# ls
haproxy.cfg[root@server2 haproxy]# ip addr add 172.25.53.100/24 dev eth0
[root@server2 haproxy]# vim haproxy.cfg
[root@server2 haproxy]# cat haproxy.cfg
#
# This is a sample configuration. It illustrates how to separate static objects
# traffic from dynamic traffic, and how to dynamically regulate the server load.
#
# It listens on 192.168.1.10:80, and directs all requests for Host 'img' or
# URIs starting with /img or /css to a dedicated group of servers. URIs
# starting with /admin/stats deliver the stats page.
#
global
maxconn 10000 ##最大连接数
stats socket /var/run/haproxy.stat mode 600 level admin
log 127.0.0.1 local0 ##local:日志设备
uid 188 ##默认用户UID
gid 188 ##默认用户GID
chroot /var/empty ##安全设置,根目录切换,锁在/var/empty下
daemon ##设置为后台进程
# The public 'www' address in the DMZ
frontend public
bind 172.25.53.100:80 name clear
#bind *:80
#bind 192.168.1.10:443 ssl crt /etc/haproxy/haproxy.pem ##默认配置,被frontend,backend,listen段继承使用
mode http ##Haproxy工作模式,四层工作模式为TCP,七层为HTTP
log global
option httplog ##启用http日志
option dontlognull
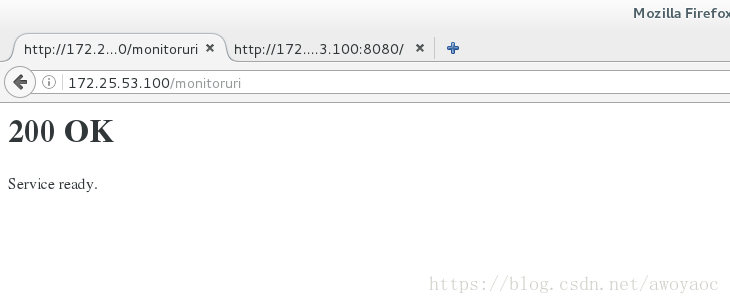
monitor-uri /monitoruri
maxconn 8000 ##每个进程的最大连接数,会覆盖global中的maxconn
timeout client 30s ##客户端非活动状态的超时时长
stats uri /admin/stats ##监控页面的URL
#use_backend static if { hdr_beg(host) -i img }
#use_backend static if { path_beg /img /css }
default_backend static
# The static backend backend for 'Host: img', /img and /css.
backend static
mode http
balance roundrobin
option prefer-last-server
retries 2 ##服务器连接失败后的重试次数
option redispatch ##如果cookie中写入ServerID而客户端不会刷新Cookie,那么当ServerID对应的服务器宕机后,将强制定向到其它健康的服务器上
timeout connect 5s ##连接最大超时时间,默认毫秒
timeout server 5s ##服务端超时时间
server statsrv1 172.25.53.4:80 check inter 1000 ##对后端服务器的健康状况检查间隔为1000毫秒
server statsrv2 172.25.53.5:80 check inter 1000测试Haproxy是否可用
[root@server2 ~]# /etc/init.d/haproxy start
Starting haproxy:                                          [  OK  ]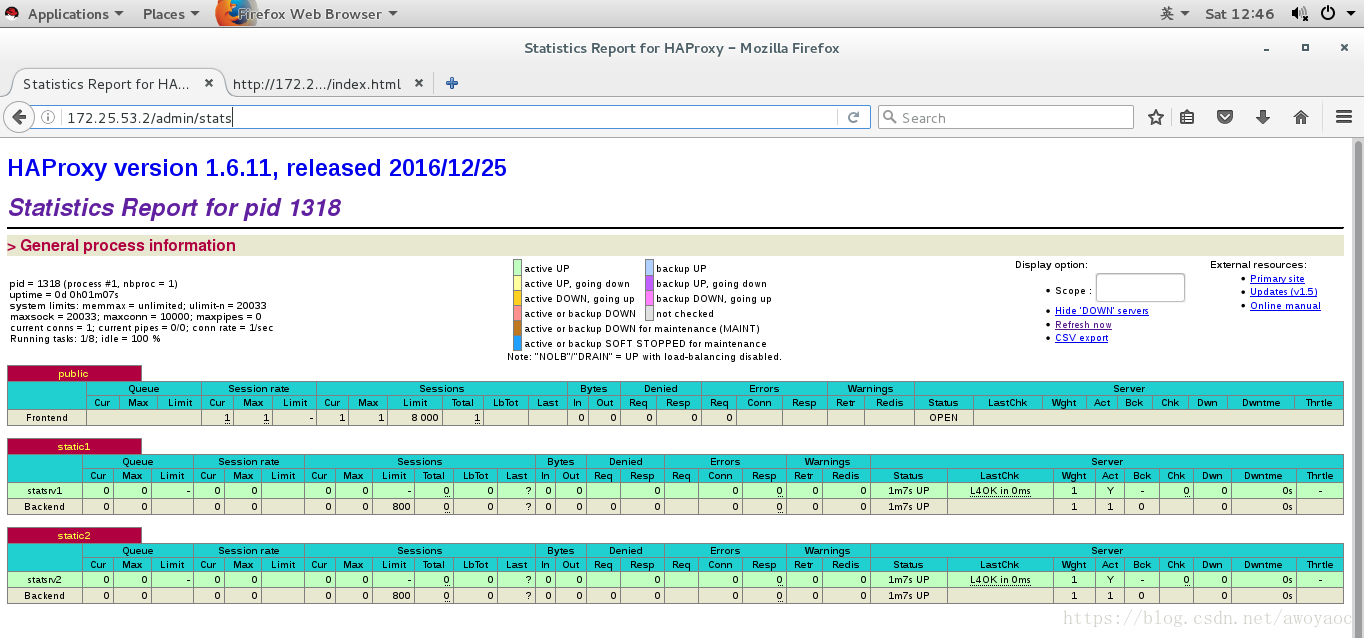
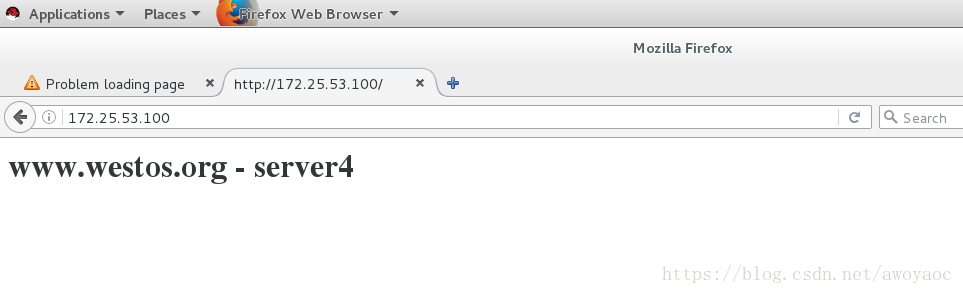
server4,5打开httpd 并发布
刷新网页,会在server4 和 server5页面来回切换

关闭server5
刷新会在一个页面停留
Haproxy采用的八种算法
roundrobin, 简单的轮询
static-rr, 根据权重
leastconn, 最少连接者先处理
source, 根据请求源IP
uri, 根据请求的URI
url_param, 根据请求的URl参数
hdr(name), 根据HTTP请求头来锁定每一次HTTP请求
rdp-cookie(name), 很据cookie(name)来锁定并哈希每一次TCP请求
动静页面分离
[root@server2 haproxy]# cat haproxy.cfg
#
# This is a sample configuration. It illustrates how to separate static objects
# traffic from dynamic traffic, and how to dynamically regulate the server load.
#
# It listens on 192.168.1.10:80, and directs all requests for Host 'img' or
# URIs starting with /img or /css to a dedicated group of servers. URIs
# starting with /admin/stats deliver the stats page.
#

global
        maxconn         10000
        stats socket    /var/run/haproxy.stat mode 600 level admin
        log             127.0.0.1 local0
        uid             188
        gid             188
        chroot          /var/empty
        daemon
defaults

        mode            http
        log             global
        option          httplog
        option          dontlognull
        monitor-uri     /monitoruri
        maxconn         8000
        timeout client  30s
        stats uri       /admin/stats
        option prefer-last-server
        retries         2
        option redispatch
        timeout connect 5s
        timeout server  5s
# The public 'www' address in the DMZ
frontend public
         bind            172.25.53.100:80 name clear
        #bind            *:80
        #bind            192.168.1.10:443 ssl crt /etc/haproxy/haproxy.pem

        #use_backend     static if { hdr_beg(host) -i img }
        #use_backend     static if { path_beg /img /css   }
    #acl blacklist src 172.25.53.250

    #http-request deny if blacklist
    #errorloc   403 http://172.25.53.100:8080

        use_backend     static2 if { path_end -i .php   }
        default_backend static1

# The static backend backend for 'Host: img', /img and /css.
backend static1
        balance         roundrobin
        server          statsrv1 172.25.53.4:80 check inter 1000
backend static2
        #balance         source
        balance         source
        server          statsrv2 172.25.53.5:80 check inter 1000
为了实现server1与server2的集群管理,将server2上与server1作相同的配置。当一个节点故障时,另一个节点会替代其进行工作。
[root@server3 ~]# yum install haproxy -y
[root@server2 ~]# scp /etc/haproxy/haproxy.cfg server3:/etc/haproxy/
[root@server3 ~]# ip addr add 172.25.53.100/24 dev eth0
[root@server3 ~]# /etc/init.d/haproxy start
Starting haproxy: [ OK ]配置pacemaker
Pacemaker是一个集群资源管理器。它利用集群基础构件(OpenAIS 、heartbeat或corosync)提供的消息和成员管理能力来探测并从节点或资源级别的故障中恢复,以实现群集服务(亦称资源)的最大可用性。
[root@server2 ~]# yum install pacemaker corosync -y
[root@server2 ~]# cp /etc/corosync/corosync.conf.example /etc/corosync/corosync.conf
[root@server2 ~]# cd /mnt/
[root@server2 mnt]# ls
crmsh-1.2.6-0.rc2.2.1.x86_64.rpm
[root@server2 mnt]# rpm -ivh crmsh-1.2.6-0.rc2.2.1.x86_64.rpm --nodeps
warning: crmsh-1.2.6-0.rc2.2.1.x86_64.rpm: Header V3 DSA/SHA1 Signature, key ID 7b709911: NOKEY
Preparing...                ########################################### [100%]
   1:crmsh                  ########################################### [100%]
[root@server2 mnt]# cd
[root@server2 ~]# vim /etc/corosync/corosync.conf
[root@server2 ~]# cat /etc/corosync/corosync.conf
# Please read the corosync.conf.5 manual page
compatibility: whitetank

totem {
    version: 2
    secauth: off
    threads: 0
    interface {
        ringnumber: 0
        bindnetaddr: 172.25.53.0
        mcastaddr: 226.94.1.1
        mcastport: 5405
        ttl: 1
    }
}

logging {
    fileline: off
    to_stderr: no
    to_logfile: yes
    to_syslog: yes
    logfile: /var/log/cluster/corosync.log
    debug: off
    timestamp: on
    logger_subsys {
        subsys: AMF
        debug: off
    }
}

amf {
    mode: disabled
}
service{
        name:pacemaker
        ver:0
}

aisexce {
        user: root
        group: root
}

quorum {
        provider: corosync_votequorum
        expected_votes: 2
        two_node: 1
}
Server3上
[root@server3 ~]# yum install pacemaker corosync -y
[root@server3 mnt]# rpm -ivh crmsh-1.2.6-0.rc2.2.1.x86_64.rpm --nodeps
warning: crmsh-1.2.6-0.rc2.2.1.x86_64.rpm: Header V3 DSA/SHA1 Signature, key ID 7b709911: NOKEY
Preparing... ########################################### [100%]
1:crmsh ########################################### [100%]
[root@server2 ~]# scp /etc/corosync/corosync.conf server3:/etc/corosync/
[root@server3 mnt]# /etc/init.d/corosync start
Starting Corosync Cluster Engine (corosync): [ OK ]
[root@server2 ~]# /etc/init.d/pacemaker start
GFS2: no entries found in /etc/fstab
Starting Pacemaker Cluster Manager [ OK ]
[root@server2 ~]# crm status
Last updated: Fri Aug 3 16:14:02 2018
Last change: Fri Aug 3 16:07:10 2018 via crmd on server2
Stack: cman
Current DC: server2 - partition with quorum
Version: 1.1.10-14.el6-368c726
2 Nodes configured
0 Resources configured
Online: [ server2 server3 ]
[root@server3 ~]# /etc/init.d/pacemaker start
GFS2: no entries found in /etc/fstab
Starting Pacemaker Cluster Manager [ OK ]
[root@server3 ~]# crm status
Last updated: Fri Aug 3 16:15:08 2018
Last change: Fri Aug 3 16:07:10 2018 via crmd on server2
Stack: cman
Current DC: server2 - partition with quorum
Version: 1.1.10-14.el6-368c726
2 Nodes configured
0 Resources configured
Online: [ server2 server3 ]
[root@server3 ~]# crm status
Last updated: Fri Aug 3 16:22:09 2018
Last change: Fri Aug 3 16:07:10 2018 via crmd on server2
Stack: cman
Current DC: server2 - partition with quorum
Version: 1.1.10-14.el6-368c726
2 Nodes configured
0 Resources configured
Online: [ server2 server3 ]测试停掉server2
[root@server2 ~]# crm node standby
[root@server2 ~]# crm status
Last updated: Fri Aug 3 16:53:13 2018
Last change: Fri Aug 3 16:53:07 2018 via crm_attribute on server2
Stack: cman
Current DC: server2 - partition with quorum
Version: 1.1.10-14.el6-368c726
2 Nodes configured
0 Resources configured
Node server2: standby
Online: [ server3 ]
[root@server2 ~]# crm node online
停掉server3
[root@server3 ~]# crm node standby
[root@server3 ~]# crm status
Last updated: Fri Aug  3 16:54:13 2018
Last change: Fri Aug  3 16:54:08 2018 via crm_attribute on server2
Stack: cman
Current DC: server2 - partition with quorum
Version: 1.1.10-14.el6-368c726
2 Nodes configured
0 Resources configured


Node server3: standby
Online: [ server2 ]
都停掉
[root@server2 ~]# crm node standby
[root@server2 ~]# crm status
Last updated: Fri Aug  3 16:55:45 2018
Last change: Fri Aug  3 16:55:39 2018 via crm_attribute on server2
Stack: cman
Current DC: server2 - partition with quorum
Version: 1.1.10-14.el6-368c726
2 Nodes configured
0 Resources configured


Node server2: standby
Node server3: standby