阿里云服务器
- 选择云服务器:阿里云服务器 https://www.aliyun.com
- 个人免费获取 [https://free.aliyun.com/]
- 创建服务器选择ubuntu16.04 64位的操作系统
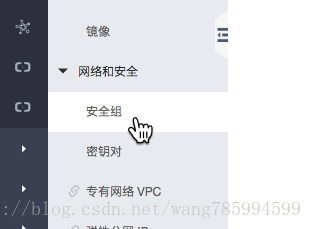
- 进入控制台,查看实例创建情况
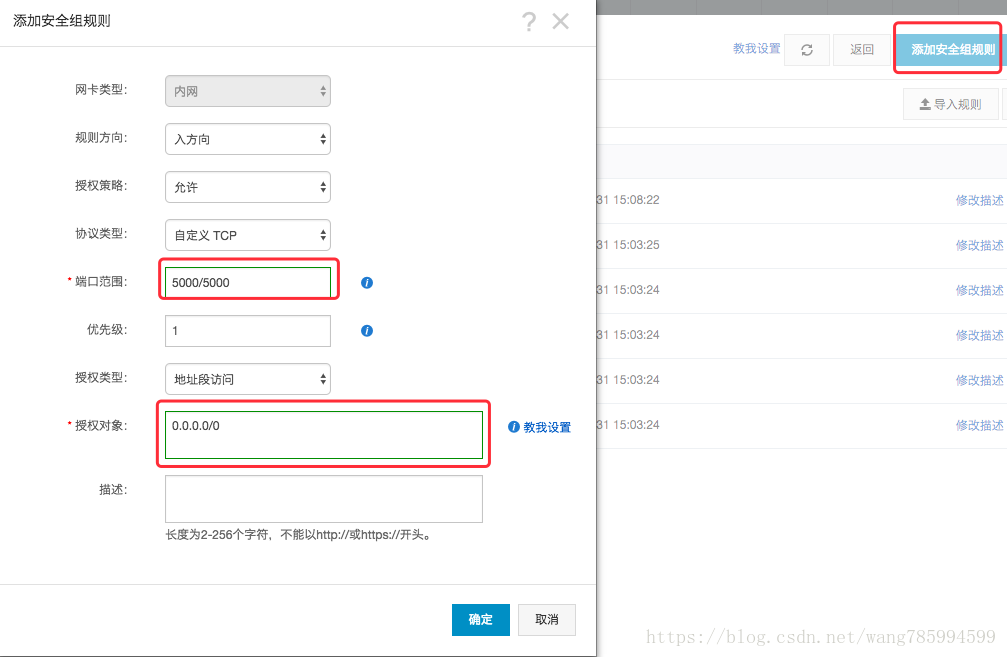
- 给安全组配置规则,添加5000端口(一并加上5001端口)

- 利用命令行进行远程服务器登录
ssh 用户名@ip地址相关环境安装
以下操作都在远程服务器上进行操作 (ubuntu 16.04)
- 先更新 apt 相关源
sudo apt-get update
- mysql安装
apt-get install mysql-server
apt-get install libmysqlclient-dev- redis安装
sudo apt-get install redis-server
- 安装虚拟环境
pip install virtualenv
pip install virtualenvwrapper
- 使得安装的virtualenvwrapper生效,编辑~/.bashrc文件,内容如下:
export WORKON_HOME=$HOME/.virtualenvs
export PROJECT_HOME=$HOME/workspace
source /usr/local/bin/virtualenvwrapper.sh
- 使编辑后的文件生效
source ~/.bashrc安装python3.6
wget https://www.python.org/ftp/python/3.6.3/Python-3.6.3.tar.xz
解压下载好的原文件
tar -xvf Python-3.6.3.tar.xz
cd到刚解压的目录后,对源文件进行编译安装
cd Python-3.6.3
./configure
make
make install
给Python3起一个别名:alias python=python3
alias python=python3
此时运行项目会出现 ''ImportError: No module named _ss"
解决方法:
修改 /root/Python-3.6.5/Modules/Setup.dist,解开以下注释, 并重新编译python
#修改Setup文件
vi /root/Python-3.6.5/Modules/Setup.dist
#修改结果如下:
# Socket module helper for socket(2)
_socket socketmodule.c timemodule.c

# Socket module helper for SSL support; you must comment out the other
# socket line above, and possibly edit the SSL variable:
SSL=/usr/local/ssl
_ssl _ssl.c \
-DUSE_SSL -I$(SSL)/include -I$(SSL)/include/openssl \
编译安装
./configure --prefix=/usr/local/python
makemake install
Nginx
- 采用 C 语言编写
- 实现分流、转发、负载均衡
相关操作
- 安装
$ sudo apt-get install nginx
- 运行及停止
/etc/init.d/nginx start #启动
/etc/init.d/nginx stop  #停止
- 配置文件
- 编辑文件:/etc/nginx/sites-available/default
# 如果是多台服务器的话,则在此配置,并修改 location 节点下面的 proxy_pass
upstream flask {
        server 127.0.0.1:5000;
        server 127.0.0.1:5001;
}
server {
        # 监听80端口
        listen 80 default_server;
        listen [::]:80 default_server;

        root /var/www/html;

        index index.html index.htm index.nginx-debian.html;

        server_name _;

        location / {
                # 请求转发到gunicorn服务器
                proxy_pass http://127.0.0.1:5000;
                # 请求转发到多个gunicorn服务器
                # proxy_pass http://flask;
                # 设置请求头,并将头信息传递给服务器端
                proxy_set_header Host $host;
                # 设置请求头,传递原始请求ip给 gunicorn 服务器
                proxy_set_header X-Real-IP $remote_addr;
        }
}
Gunicorn
- Gunicorn(绿色独角兽)是一个Python WSGI的HTTP服务器
- 从Ruby的独角兽(Unicorn )项目移植
- 该Gunicorn服务器与各种Web框架兼容,实现非常简单,轻量级的资源消耗
- Gunicorn直接用命令启动,不需要编写配置文件
相关操作
- 安装
pip install gunicorn
- 查看选项
gunicorn -h
- 运行
# -w: 表示进程(worker) -b:表示绑定ip地址和端口号(bind)
gunicorn -w 2 -b 127.0.0.1:5000 运行文件名称:Flask程序实例名
pstree -ap|grep gunicorn#获取gunicorn进程树其他操作
- 拷贝本地代码到远程
scp -r 本地文件路径 [email protected]:远程保存路径