1.需求分析
在实际项目业务需求中,很多场景需要逻辑解耦,这时候mq是最好的选择,rabbitmq作为一个高可用性,高扩展性的消息中间件,很好的解决了上下游业务逻辑的解耦合;
2.rabbitmq集成实现
rabbitmq的安装教程链接:https://blog.csdn.net/zhangxing52077/article/details/79701421
① rabbitmq的pom依赖
<!--rabbitmq依赖 -->
<dependency>
   <groupId>org.springframework.amqp</groupId>
   <artifactId>spring-rabbit</artifactId>
   <version>1.3.5.RELEASE</version>
</dependency>
②rabbitmq连接配置
mq.host=192.168.12.137
mq.username=root
mq.password=zhangxing
mq.port=5672
mq.vhost=/
③rabbitmq在spring.xml中配置
<?xml version="1.0" encoding="UTF-8"?>
<beans xmlns="http://www.springframework.org/schema/beans"
   xmlns:xsi="http://www.w3.org/2001/XMLSchema-instance" xmlns:rabbit="http://www.springframework.org/schema/rabbit"
   xmlns:context="http://www.springframework.org/schema/context"
   xsi:schemaLocation="http://www.springframework.org/schema/beans
     http://www.springframework.org/schema/beans/spring-beans-3.0.xsd
     http://www.springframework.org/schema/context
    http://www.springframework.org/schema/context/spring-context-3.1.xsd
     http://www.springframework.org/schema/rabbit
     http://www.springframework.org/schema/rabbit/spring-rabbit-1.0.xsd">

   <!-- 激活annotation功能 -->
   <context:annotation-config />

   <!-- 加载rabbitmq连接配置 -->
   <bean id="propertyConfigurer" class="org.springframework.beans.factory.config.PropertyPlaceholderConfigurer">
      <property name="properties" ref="configProperties" />
   </bean>

   <bean id="configProperties" class="org.springframework.beans.factory.config.PropertiesFactoryBean">
      <property name="locations">
         <list>
            <value>classpath:rabbitmq.properties</value>
         </list>
      </property>
   </bean>

   <!--配置connection-factory,指定连接rabbit server参数 -->
   <rabbit:connection-factory id="connectionFactory"
      username="${mq.username}" password="${mq.password}" host="${mq.host}" port="${mq.port}" />

   <!--定义rabbit template用于数据的接收和发送 -->
   <rabbit:template id="amqpTemplate" connection-factory="connectionFactory"
      exchange="exchangeTest" />

   <!--通过指定下面的admin信息,当前producer中的exchange和queue会在rabbitmq服务器上自动生成 -->
   <rabbit:admin connection-factory="connectionFactory" />

   <!--定义queue -->
   <rabbit:queue name="zhangxing" durable="true" auto-delete="false"
      exclusive="false" />


   <!-- exchange queue binging key 绑定 -->
   <rabbit:direct-exchange name="exchangeTest" durable="true" auto-delete="false">
      <rabbit:bindings>
         <rabbit:binding queue="zhangxing" key="queueKey"></rabbit:binding>
      </rabbit:bindings>
   </rabbit:direct-exchange>

   <!-- 消息接收者 -->
   <bean id="MessageProducer" class="com.amqp.producer.MessageProducer"></bean>

   <!-- 消息接收者 -->
   <bean id="messageReceiver" class="com.amqp.consumer.MessageConsumer"></bean>

   <!-- queue litener 观察 监听模式 当有消息到达时会通知监听在对应的队列上的监听对象 -->
   <rabbit:listener-container connection-factory="connectionFactory">
      <rabbit:listener queues="zhangxing" ref="messageReceiver" />
   </rabbit:listener-container>

</beans>
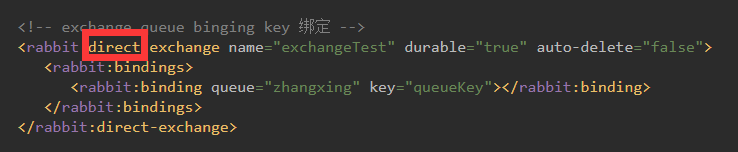
红色方框标注的地方可以切换exchange的type,其中的key表示routingKeys

监听消息出发消费者回调逻辑;
④生产者
/**
 * 功能概要:消息产生,提交到队列中去
 */
@Component
public class MessageProducer {

   @Resource
   private AmqpTemplate amqpTemplate;

   public void sendMessage(String queueKey,Object message) {

      amqpTemplate.convertAndSend(queueKey, message);
   }
}
⑤消费者
/**
 * 功能概要:消费接收
 */
public class MessageConsumer implements MessageListener {


   public void onMessage(Message message) {

      /**
       * 执行具体的逻辑
       */
      String receiveStr = new String(message.getBody());
      System.out.println("receive message: "+receiveStr);
      Map<String,Object> map = JSONObject.parseObject(receiveStr);
      System.out.println("receive message: "+map.get("serviceId").toString());

   }

}
3测试用例
@RunWith(SpringJUnit4ClassRunner.class)
@ContextConfiguration(locations = "classpath:application-rabbitMq.xml")
public class TestMain {

   @Autowired
   MessageProducer messageProducer;

   @Test
   public void test(){
      /*发送字符串参考*/
      JSONObject json = new JSONObject();
      json.put("serviceId", "123456");
      json.put("orderId","123456");
      json.put("channel","zhangxing");

      messageProducer.sendMessage("queueKey",json.toString());
      System.out.println("OK");

   }


}
测试结果

笔者的mq理解:生产者发布消息后,消费者监听到后立即执行回调方法或逻辑;
好了,我是张星,欢迎加入博主技术交流群,群号:313145288