前言
补丁包是大多数项目型产品在其运行的生命周期内进行日常维护必不可少的手段之一,在产品的运维中扮演着非常重要的作用
当产品在生产花环境稳定运行的过程出现了功能性或非功能性bug,而客户方并不打算在短期内重新考虑升级计划时,对于产品开发者,可以在修复原版本产品bug基础上,进行增量补丁包的发布
关于补丁包的做法,不同的语言和不同的技术框架也有所差别,本篇以目前Java开发中比较通用的springboot框架为例,通过一个简单的案例进行说明
补丁包涉及到的主要技术
assembly + antrun
首先简单说明下这两个组件,也可以理解为使用这两个插件做补丁包的构建。
assembly : 我们一般java工程都是通过Maven来管理构建的,要使用的时候就使用了jar形式,而我们知道其中有很多的依赖,而Maven本身的打包成jar是不包含这些依赖的,我们可以在pom.xml中配置maven-assembly-plugin来实现依赖打包;
antrun : 程序的pom文件中引入了antrun插件之后,可以帮助我们在打包的时候,灵活而方便的对项目工程中的各个模块文件进行各种操作,比如自定义文件拷贝目录,即做到动态管理各种资源文件
环境准备
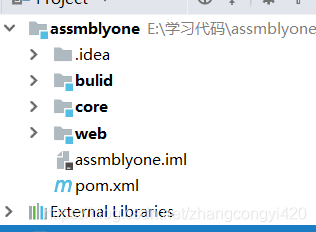
基于maven,快速搭建一个简单的聚合工程,本工程包含3部分,web模块,core模块和build打包模块,模拟真实工程,甚至还可以创建更多模块
1、根pom依赖
	<dependencyManagement>
        <dependencies>
            <dependency>
                <groupId>org.springframework.boot</groupId>
                <artifactId>spring-boot-dependencies</artifactId>
                <version>${spring-boot-version}</version>
                <type>pom</type>
                <scope>import</scope>
            </dependency>
        </dependencies>

    </dependencyManagement>

    <build>
        <plugins>
            <plugin>
                <groupId>org.apache.maven.plugins</groupId>
                <artifactId>maven-compiler-plugin</artifactId>
                <configuration>
                    <source>1.8</source>
                    <target>1.8</target>
                </configuration>
            </plugin>
            <plugin>
                <groupId>org.apache.maven.plugins</groupId>
                <artifactId>maven-jar-plugin</artifactId>
                <version>2.4</version>
                <configuration>
                    <archive>
                        <manifestEntries>
                            <Ant-Version>2.0.14.0</Ant-Version>
                        </manifestEntries>
                    </archive>
                </configuration>
            </plugin>
        </plugins>
    </build>
本项目作为演示案例,并没有引入过多依赖,因此只导入了springboot-web,可以结合实际需要继续添加
2、web模块pom依赖
<?xml version="1.0" encoding="UTF-8"?>
<project xmlns="http://maven.apache.org/POM/4.0.0"
xmlns:xsi="http://www.w3.org/2001/XMLSchema-instance"
xsi:schemaLocation="http://maven.apache.org/POM/4.0.0 http://maven.apache.org/xsd/maven-4.0.0.xsd">
<parent>
<artifactId>assmblytest</artifactId>
<groupId>com.congge</groupId>
<version>1.0-SNAPSHOT</version>
</parent>
<modelVersion>4.0.0</modelVersion>
<artifactId>web</artifactId>
<dependencies>
<dependency>
<groupId>org.springframework.boot</groupId>
<artifactId>spring-boot-starter-web</artifactId>
</dependency>
</dependencies>
<build>
<plugins>
<plugin>
<groupId>org.apache.maven.plugins</groupId>
<artifactId>maven-jar-plugin</artifactId>
<configuration>
<excludes>
<exclude>*.properties</exclude>
<exclude>*.yml</exclude>
</excludes>
<archive>
<addMavenDescriptor>false</addMavenDescriptor>
<manifest>
<!-- 为依赖包添加路径, 这些路径会写在MANIFEST文件的Class-Path下 -->
<mainClass>com.congge.App</mainClass>
<!-- 打包时 MANIFEST.MF文件不记录的时间戳版本 -->
<useUniqueVersions>false</useUniqueVersions>
</manifest>
<manifestEntries>
<!-- 在Class-Path下添加配置文件的路径 -->
<Class-Path>conf/</Class-Path>
</manifestEntries>
</archive>
</configuration>
</plugin>
<plugin>
<groupId>org.apache.maven.plugins</groupId>
<artifactId>maven-assembly-plugin</artifactId>
<version>2.4</version>
<executions>
<execution>
<id>build-bin</id>
<phase>package</phase>
<goals>
<goal>single</goal>
</goals>
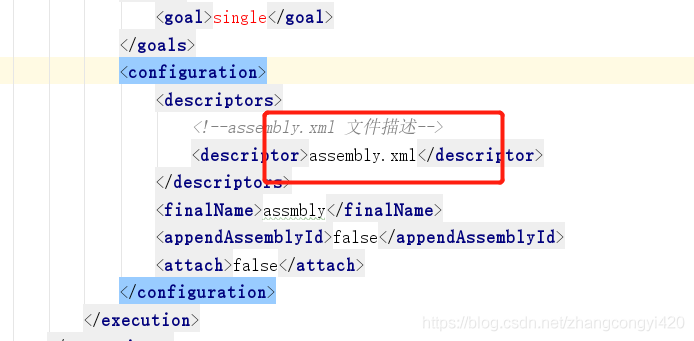
<configuration>
<descriptors>
<!--assembly.xml 文件描述-->
<descriptor>assembly.xml</descriptor>
</descriptors>
<finalName>assmbly</finalName>
<appendAssemblyId>false</appendAssemblyId>
<attach>false</attach>
</configuration>
</execution>
</executions>
</plugin>
</plugins>
<resources>
<!--根据需要进行添加-->
<!--<resource>
<directory>src/main/java</directory>
<includes>
<include>src/main/resources/mapper/*.xml</include>
</includes>
</resource>-->
<resource>
<directory>src/main/resources</directory>
<filtering>true</filtering>
</resource>
</resources>
</build>
</project>
在pom依赖中,指定了assembly的文件位置
assembly文件,可以理解为定义项目资源文件目录的描述元信息,比如说,你即将要打的补丁包里面的一些class文件,一些配置文件,甚至数据库脚本等
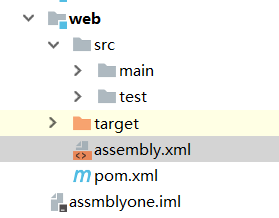
比如我这里,在web模块下,指定的assembly文件就在web的根目录下
<assembly xmlns="http://maven.apache.org/plugins/maven-assembly-plugin/assembly/1.1.2"
		  xmlns:xsi="http://www.w3.org/2001/XMLSchema-instance"
		  xsi:schemaLocation="http://maven.apache.org/plugins/maven-assembly-plugin/assembly/1.1.2 http://maven.apache.org/xsd/assembly-1.1.2.xsd">
	<id>bin</id>
	<includeBaseDirectory>false</includeBaseDirectory>
	<formats>
        <format>dir</format>
        <format>tar.gz</format>
	</formats>
	<dependencySets>

		<dependencySet>
			<!--是否把本项目添加到依赖文件夹下:-->
			<useProjectArtifact>false</useProjectArtifact>
			<!-- 将项目所有依赖包拷贝到发布包的lib目录下 :-->
			<outputDirectory>lib</outputDirectory>
			<!-- 符合runtime作用范围的依赖会被打包进去: -->
			<scope>runtime</scope>
		</dependencySet>

	</dependencySets>

	<fileSets>
		<!--数据库脚本文件-->
		<!--<fileSet>
			<directory>target/classes/database/mysql</directory>
			<outputDirectory>database/mysql</outputDirectory>
			<includes>
				<include>*.sql</include>
			</includes>
			<fileMode>0755</fileMode>
		</fileSet>-->
		<fileSet>
			<directory>..</directory>
			<outputDirectory>config/</outputDirectory>
			<lineEnding>unix</lineEnding>
			<includes>
				<include>bootstrap.yml</include>
			</includes>
			<fileMode>0755</fileMode>
		</fileSet>
		<fileSet>
			<directory>target/classes</directory>
			<outputDirectory>config</outputDirectory>
			<includes>
				<include>*.properties</include>
			</includes>
			<fileMode>0755</fileMode>
		</fileSet>
	</fileSets>
</assembly>
在实际项目中,可能其他的除了web之外的模块也需要进行资源文件的补丁包打包,也可以像上面这样同样的操作即可
3、build模块pom依赖
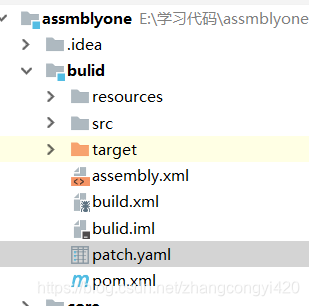
build模块可以单独作为构建补丁包的模块进行统一管理,这样做的好处是,补丁包的最终出处在这个模块下,里面可以进行各种文件的管理,比如jar包目录,class文件目录,甚至各种启动脚本等
pom依赖
<?xml version="1.0" encoding="UTF-8"?>
<project xmlns="http://maven.apache.org/POM/4.0.0"
         xmlns:xsi="http://www.w3.org/2001/XMLSchema-instance"
         xsi:schemaLocation="http://maven.apache.org/POM/4.0.0 http://maven.apache.org/xsd/maven-4.0.0.xsd">
    <parent>
        <artifactId>assmblytest</artifactId>
        <groupId>com.congge</groupId>
        <version>1.0-SNAPSHOT</version>
    </parent>
    <modelVersion>4.0.0</modelVersion>

    <artifactId>bulid</artifactId>

    <dependencies>
        <dependency>
            <groupId>org.springframework.boot</groupId>
            <artifactId>spring-boot-starter-web</artifactId>
        </dependency>
    </dependencies>

    <profiles>
        <profile>
            <id>deploy</id>
            <activation>
                <activeByDefault>true</activeByDefault>
            </activation>
            <build>
                <plugins>
                    <plugin>
                        <groupId>org.apache.maven.plugins</groupId>
                        <artifactId>maven-assembly-plugin</artifactId>
                        <version>2.6</version>
                        <executions>
                            <execution>
                                <id>build-bin</id>
                                <phase>package</phase>
                                <goals>
                                    <goal>single</goal>
                                </goals>
                                <configuration>
                                    <tarLongFileMode>gnu</tarLongFileMode>
                                    <descriptors>
                                        <descriptor>assembly.xml</descriptor>
                                    </descriptors>
                                    <outputDirectory>target</outputDirectory>
                                    <finalName>assmblytest</finalName>
                                    <appendAssemblyId>false</appendAssemblyId>
                                </configuration>
                            </execution>
                        </executions>
                    </plugin>
                    <plugin>
                        <groupId>org.apache.maven.plugins</groupId>
                        <artifactId>maven-antrun-plugin</artifactId>
                        <version>1.7</version>
                        <executions>
                            <execution>
                                <phase>package</phase>
                                <goals>
                                    <goal>run</goal>
                                </goals>
                                <configuration>
                                    <tasks>
                                        <ant antfile="${basedir}/build.xml"/>
                                    </tasks>
                                </configuration>
                            </execution>
                        </executions>
                    </plugin>

                </plugins>
            </build>
        </profile>
    </profiles>
</project>
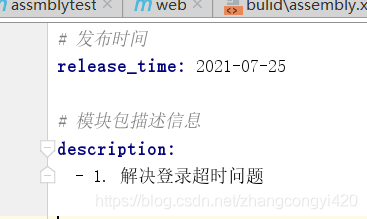
patch.yaml ,用于描述补丁包中解决的bug等信息,通常根据自己项目规范即可
build.xml 制作补丁包时最终补丁包文件的位置信息描述,即可以理解为补丁包中的文件包括哪些?这些文件从哪里来?
一旦当你的描述信息正确无误时候,运行maven命令时候,ant插件就会按照描述信息将补丁包制作好,如下是一个标准的样板文件,可根据自身需要进行修改即可使用
<?xml version="1.0" encoding="UTF-8" ?>
<project name="tenant-project" default="build">
    <target name="build">
        <!--创建一个文件目录,用于存放最终的补丁包文件-->
        <mkdir dir="target/patch/assmblytest"/>
        <!--将patch.yaml 拷贝到补丁包目录-->
        <copy file="patch.yaml" todir="target/patch/assmblytest"/>

        <!--将依赖jar包拷贝到补丁包的 assmblytest/lib目录下-->
        <copydir src="target/assmblytest/assmblytest/lib" dest="target/patch/assmblytest/lib">
            <include name="spring-*.jar"/>
        </copydir>

        <!--将依赖的资源配置文件拷贝到补丁包的 assmblytest/config目录下-->
        <copydir src="target/assmblytest/assmblytest/config" dest="target/patch/assmblytest/config">
            <include name="application.properties"/>
        </copydir>

        <!--最终打出来的jar包信息-->
        <tar basedir="target/patch/" compression="gzip" tarfile="target/assmblytest.tar.gz"/>
    </target>

</project>
最后,让我们来运行一下maven打包命令,看看效果如何,执行如下命令:
mvn clean package -U -DskipTests
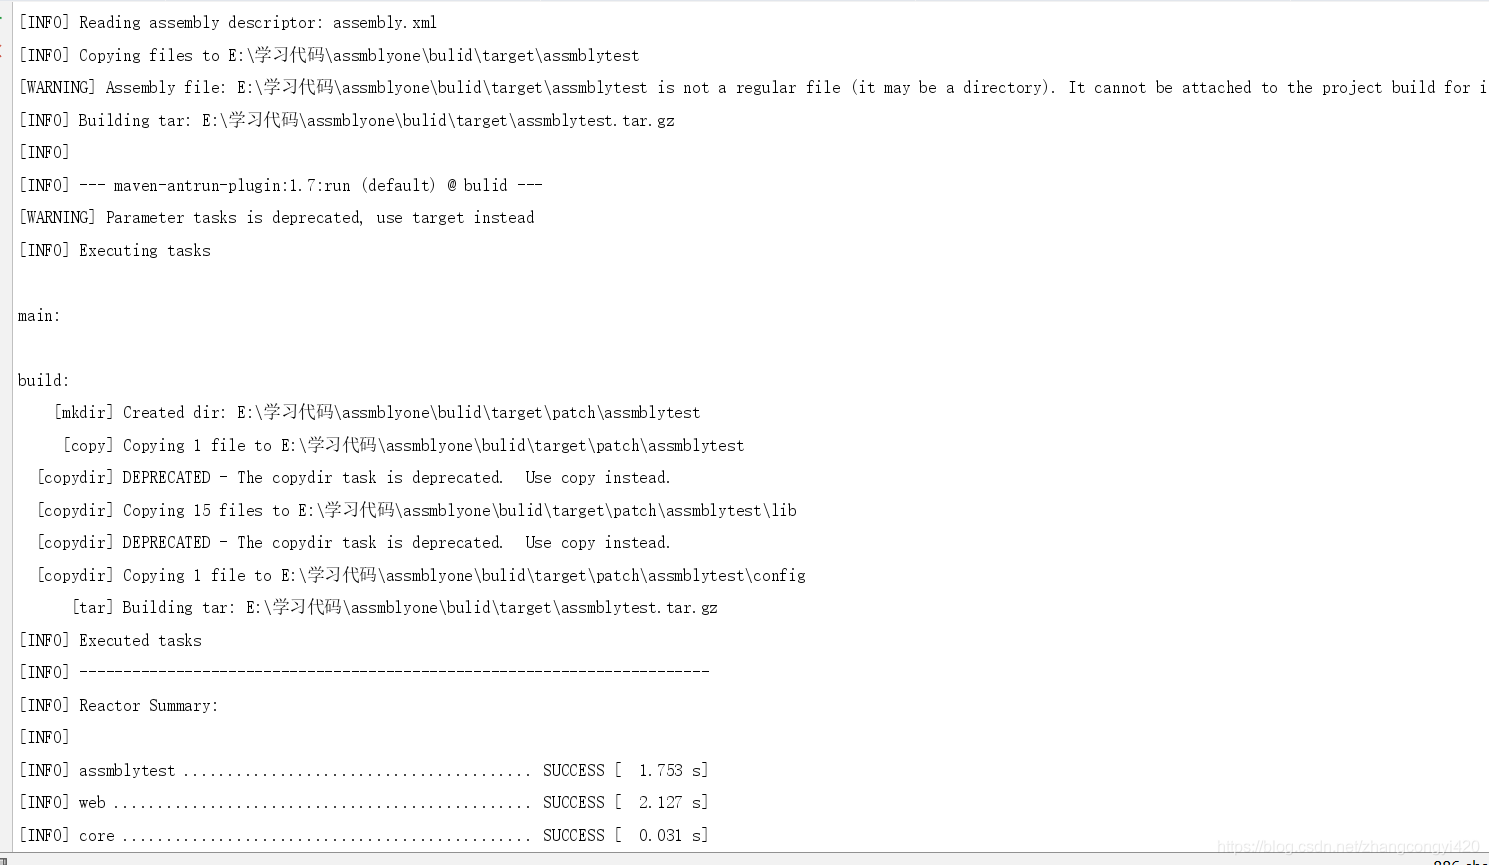
通过运行中的日志,也可以大概看出其打补丁包的执行过程
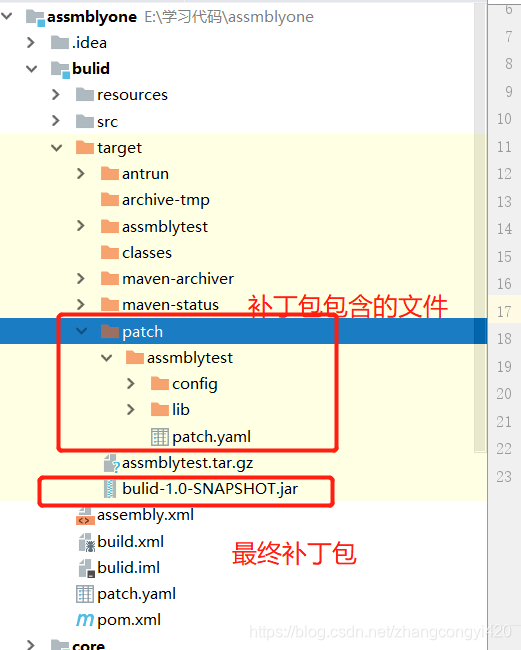
到这一步,我们完成了补丁包的制作,但这个是比较粗略的,真正项目中,还需要遵循公司的规范,比如补丁包的命名规范
同时,通过此例,可以看到,该补丁包属于增量补丁包,后续的流程是,通过shell命令,解压补丁包,将补丁包内的各个层级的文件,比如配置文件,依次替换生产环境下匹配目录下的文件,最后重启服务即可
本篇到此结束,最后感谢观看!