本文 从零到一 带你实战 openlayers 离线地图的使用,内容包括:
- 获取离线地图瓦片
- openlayers加载离线地图瓦片
- 显示地理坐标
- 显示地理坐标范围。
- openlayers 官网 这个是一定要看的。openlayers的api 相比于 商用的地图(比如 高德 百度 之类的)确实不怎么友好。
获取离线地图瓦片

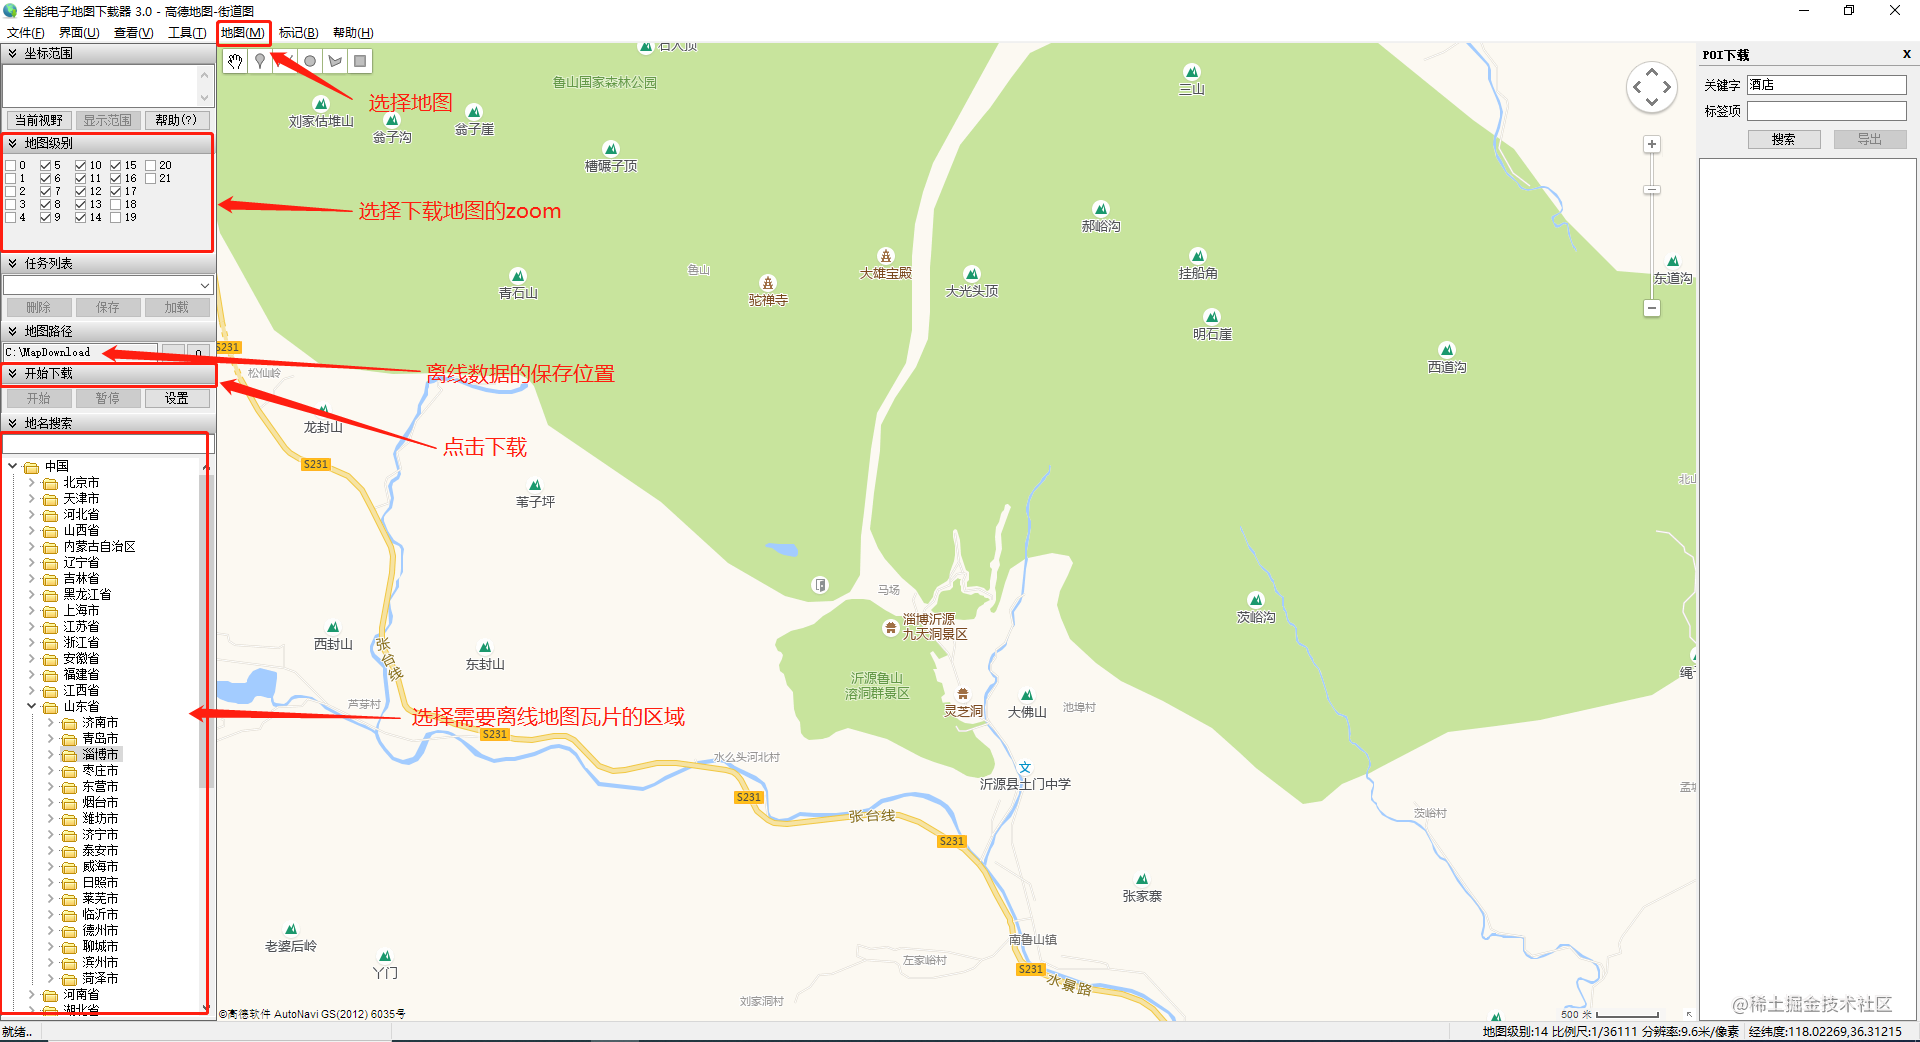
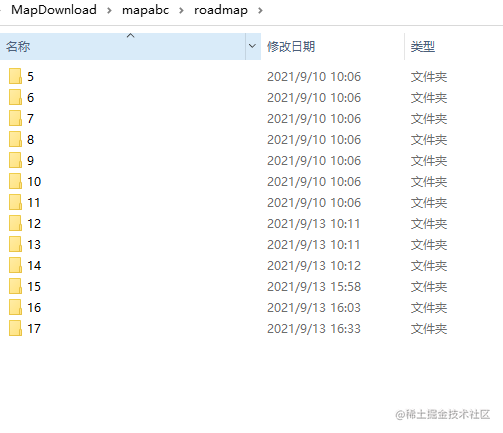
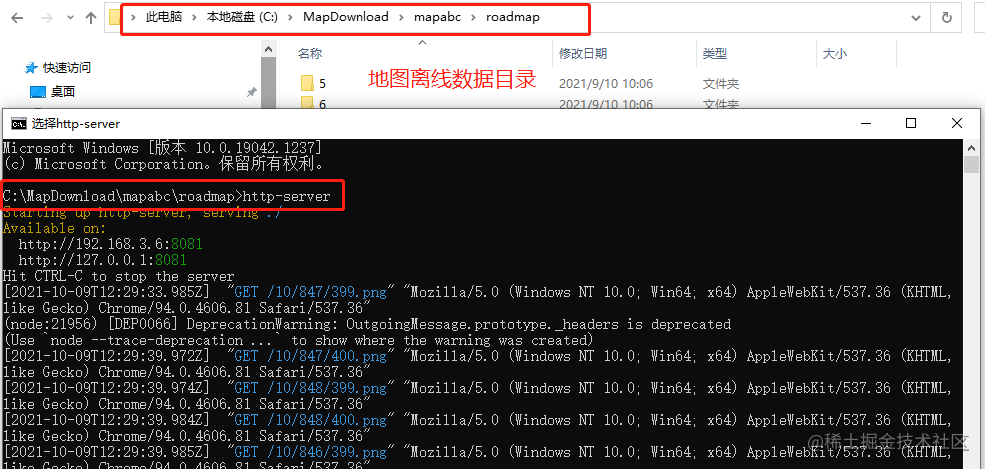
发布离线数据
openlayers 加载离线地图 本文以 vue 项目为例
安装 openlayers
- 文档
npm install ol- 当然也可以通过js直接引入
<script src="https://cdn.jsdelivr.net/gh/openlayers/openlayers.github.io@master/en/v6.8.1/build/ol.js"></script>
<link rel="stylesheet" href="https://cdn.jsdelivr.net/gh/openlayers/openlayers.github.io@master/en/v6.8.1/css/ol.css">
复制代码
创建地图并加载点位
<template>
<div style="width: 100%;height: 100%">
<div class="map" id="map"></div>
<el-card id="popup" class="popup">
<div class="popupContainer"></div>
</el-card>
</div>
</template>
<script>
import 'ol/ol.css';
import Map from 'ol/Map';
import Feature from 'ol/Feature';
import VectorSource from 'ol/source/Vector';
import Overlay from 'ol/Overlay';
import {Tile as TileLayer, Vector as VectorLayer} from 'ol/layer';
import View from 'ol/View';
import {transform} from 'ol/proj';
import XYZ from 'ol/source/XYZ'
import Point from 'ol/geom/Point';
import GeoJSON from 'ol/format/GeoJSON';
import {Fill, Stroke, Icon, Style} from 'ol/style'
import markerImg from '@/assets/img/markerIcon.png'
export default {
name: "openlayersMap",
data () {
return {
mapObj: null,
mapDom: null,
mapPointList: [],
pointLayerSource:null,
pointLayer: null,
markerIcon: markerImg
}
},
mounted() {
this.initMap()
},
methods: {
mapClear (){
if (this.mapDom) {
this.mapDom.innerHTML = ''
this.mapDom = null
}
},
initMap () {
this.mapClear()
this.mapDom = document.getElementById('map')
this.mapObj = new Map({
target: this.mapDom,
view: new View({
center: [117.990969, 36.635013],
zoom: 10,
projection: 'EPSG:4326'
})
})
const offlineMapLayer = new TileLayer({
source: new XYZ({
url: 'http://192.168.3.6:8081' + '/{z}/{x}/{y}.png'
})
})
this.mapObj.addLayer(offlineMapLayer)
this.addPoint()
},
addPoint () {
this.delPointAll()
const pointData = [
{longitude: 117.990969, latitude: 36.635013}
]
pointData.map(item => {
const point = new Feature({
geometry: new Point([item.longitude, item.latitude]),
data: item
})
const iconStyle = new Style({
image: new Icon({
color: '#ffffff',
crossOrigin: 'anonymous',
src: this.markerIcon,
}),
})
point.setStyle(iconStyle)
this.mapPointList.push(point)
})
this.pointLayerSource = new VectorSource({features: this.mapPointList})
this.pointLayer = new VectorLayer({source: this.pointLayerSource})
this.mapObj.addLayer(this.pointLayer)
},
delPointAll(){
if (this.pointLayerSource) {
this.mapPointList.map(item => {
this.pointLayerSource.removeFeature(item)
})
this.mapObj.removeLayer(this.pointLayer)
this.pointLayerSource = null
this.pointLayer = null
this.mapPointList = []
}
}
},
beforeDestroy() {
this.mapClear()
}
}
</script>
<style scoped>
.map {
width: 100%;
height: 100%;
}
</style>
复制代码
地理点位追加
- 图层数据源
VectorSource 创建后提供一个 addFeature 方法 pointLayerSource.addFeature(item) item 是创建 point 点数据如:
const point = new Feature({
geometry: new Point([item.longitude, item.latitude]),
data: item
})
const iconStyle = new Style({
image: new Icon({
color: '#ffffff',
crossOrigin: 'anonymous',
src: this.markerIcon,
}),
})
point.setStyle(iconStyle)
复制代码
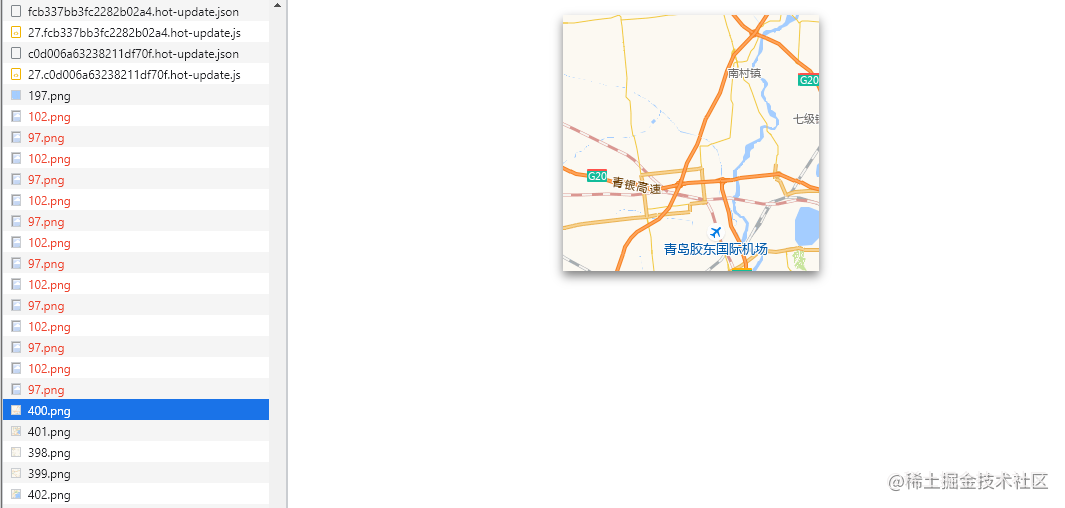
不出意外页面会展示地图 和一个定位点 如果没有先进行如下排查
- 上边的服务第一次请求 会卡住 放到cmd 敲几下回车 即可(有请求产生)
- 查看 离线地图瓦片 请求路径是否正确
点位响应事件 展示 popup弹窗
<template>
<div style="width: 100%;height: 100%">
<div class="map" id="map"></div>
<el-card id="popup" class="popup">
<div class="popupContainer"></div>
</el-card>
</div>
</template>
<script>
import 'ol/ol.css';
import Map from 'ol/Map';
import Feature from 'ol/Feature';
import VectorSource from 'ol/source/Vector';
import Overlay from 'ol/Overlay';
import {Tile as TileLayer, Vector as VectorLayer} from 'ol/layer';
import View from 'ol/View';
import {transform} from 'ol/proj';
import XYZ from 'ol/source/XYZ'
import Point from 'ol/geom/Point';
import GeoJSON from 'ol/format/GeoJSON';
import {Fill, Stroke, Icon, Style} from 'ol/style'
import markerImg from '@/assets/img/markerIcon.png'
export default {
name: "openlayersMap",
data () {
return {
mapObj: null,
mapDom: null,
mapPointList: [],
pointLayerSource:null,
pointLayer: null,
markerIcon: markerImg
}
},
mounted() {
this.initMap()
},
methods: {
mapClear (){
if (this.mapDom) {
this.mapDom.innerHTML = ''
this.mapDom = null
}
},
initMap () {
this.mapClear()
this.mapDom = document.getElementById('map')
this.mapObj = new Map({
target: this.mapDom,
view: new View({
center: [117.990969, 36.635013],
zoom: 10,
projection: 'EPSG:4326'
})
})
const offlineMapLayer = new TileLayer({
source: new XYZ({
url: 'http://192.168.3.6:8081' + '/{z}/{x}/{y}.png'
})
})
this.mapObj.addLayer(offlineMapLayer)
this.mapOnClick()
this.addPoint()
},
mapOnClick (){
const self = this
const popupDom = document.getElementById('popup')
const popup = new Overlay({
element: popupDom,
positioning: 'bottom-center',
stopEvent: false
})
this.mapObj.addOverlay(popup)
this.mapObj.on('click', function (evt) {
const feature = self.mapObj.forEachFeatureAtPixel(evt.pixel, function (feature) {
return feature;
})
const isClickPopUp = evt.originalEvent.path.map(item => item.className).includes('el-card__body')
if (!isClickPopUp) {
popupDom.style.display = 'none'
}
const popupContainer = document.getElementsByClassName('popupContainer')[0]
if (feature) {
if (feature.values_.data) {
const pointData = feature.values_.data
popup.setPosition(evt.coordinate)
popupContainer.innerHTML = `<div>${pointData.name}</div>`
popupDom.style.display = 'block'
}
}
})
},
addPoint () {
this.delPointAll()
const pointData = [
{longitude: 117.990969, latitude: 36.635013, name: '李大壮'}
]
pointData.map(item => {
const point = new Feature({
geometry: new Point([item.longitude, item.latitude]),
data: item
})
const iconStyle = new Style({
image: new Icon({
color: '#ffffff',
crossOrigin: 'anonymous',
src: this.markerIcon,
}),
})
point.setStyle(iconStyle)
this.mapPointList.push(point)
})
this.pointLayerSource = new VectorSource({features: this.mapPointList})
this.pointLayer = new VectorLayer({source: this.pointLayerSource})
this.mapObj.addLayer(this.pointLayer)
},
delPointAll(){
if (this.pointLayerSource) {
this.mapPointList.map(item => {
this.pointLayerSource.removeFeature(item)
})
this.mapObj.removeLayer(this.pointLayer)
this.pointLayerSource = null
this.pointLayer = null
this.mapPointList = []
}
}
},
beforeDestroy() {
this.mapClear()
}
}
</script>
<style scoped>
.map {
width: 100%;
height: 100%;
}
</style>
复制代码

添加行政区域范围
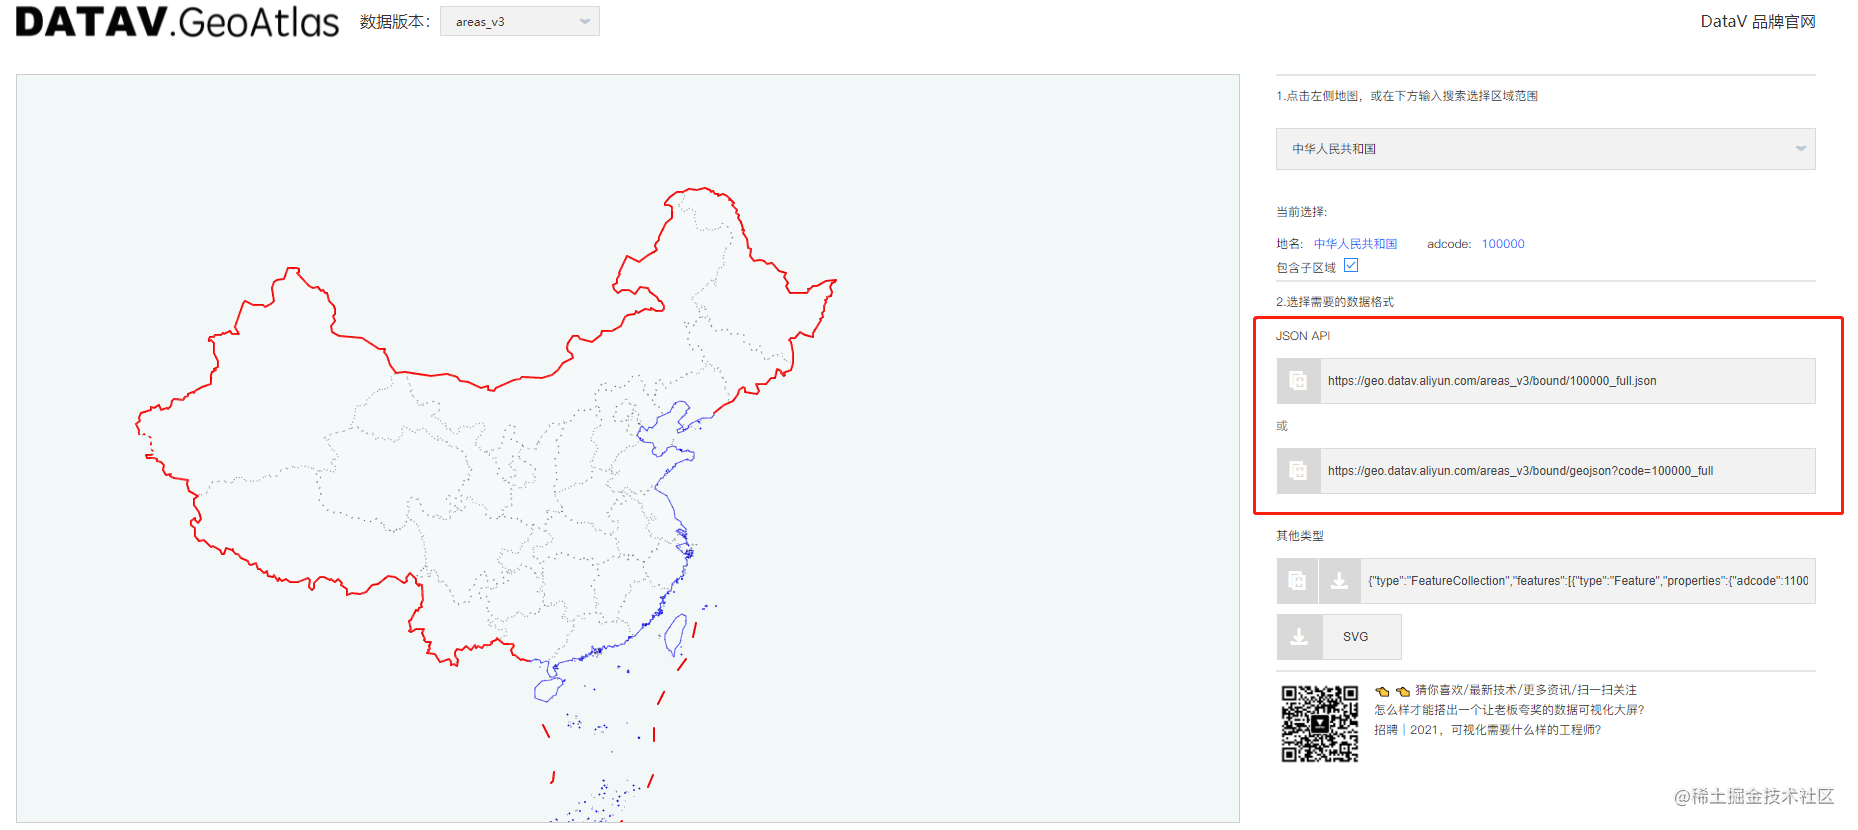
- 行政区域 是指 省 市 区的范围,一般市一份geojson 数据,可以从这里获取 datav geo
- 注意图层的顺序 点位图层不在最上层的话 可能会导致 点击事件无法正确响应 图层先添加的在下边
<template>
<div style="width: 100%;height: 100%">
<div class="map" id="map"></div>
<el-card id="popup" class="popup">
<div class="popupContainer"></div>
</el-card>
</div>
</template>
<script>
import 'ol/ol.css';
import Map from 'ol/Map';
import Feature from 'ol/Feature';
import VectorSource from 'ol/source/Vector';
import Overlay from 'ol/Overlay';
import {Tile as TileLayer, Vector as VectorLayer} from 'ol/layer';
import View from 'ol/View';
import {transform} from 'ol/proj';
import XYZ from 'ol/source/XYZ'
import Point from 'ol/geom/Point';
import GeoJSON from 'ol/format/GeoJSON';
import {Fill, Stroke, Icon, Style} from 'ol/style'
import {inject, onMounted, watch, onUnmounted} from 'vue'
import home from "@model/home";
export default {
name: "MapBox",
props: {
pointData: {
type: Array,
default: []
}
},
emits: ['mapClickPoint'],
setup(props, {emit}) {
const {APP_MAP_ZOOM, APP_MAP_TILES_URL} = window.appConfig
let mapObj = null
let mapDom = null
const mapClear = () => {
if (mapObj) {
mapDom.innerHTML = ''
}
}
onUnmounted(() => {
mapClear()
})
const initMap = () => {
mapClear()
mapDom = document.getElementById('map')
const center = transform([117.990969, 36.635013], 'EPSG:4326', 'EPSG:3857');
mapObj = new Map({
target: mapDom,
view: new View({
center: center,
zoom: APP_MAP_ZOOM,
projection: 'EPSG:3857'
})
})
const offlineMapLayer = new TileLayer({
source: new XYZ({
url: APP_MAP_TILES_URL + '/{z}/{x}/{y}.png'
})
});
mapObj.addLayer(offlineMapLayer)
mapOnClick()
addAreaPolygon()
getGpsList()
watch(() => props.pointData, () => {
addPoint()
}, {immediate: true, deep: true})
}
const mapOnClick = () => {
const popupDom = document.getElementById('popup')
const popup = new Overlay({
element: popupDom,
positioning: 'bottom-center',
stopEvent: false
})
mapObj.addOverlay(popup)
mapObj.on('click', function (evt) {
const feature = mapObj.forEachFeatureAtPixel(evt.pixel, function (feature) {
return feature;
})
const isClickPopUp = evt.originalEvent.path.map(item => item.className).includes('el-card__body')
if (!isClickPopUp) {
popupDom.style.display = 'none'
}
const popupContainer = document.getElementsByClassName('popupContainer')[0]
if (feature) {
if ( feature.values_.gpsPointData) {
const pointData = feature.values_.gpsPointData
popup.setPosition(evt.coordinate)
popupContainer.innerHTML = `<div>${pointData.name}</div>`
popupDom.style.display = 'block'
}
emit('mapClickPoint', pointData)
} else {
emit('mapClickPoint', {})
}
})
}
let mapPointList = []
let pointLayerSource = null
let pointLayer = null
const addPoint = () => {
delPointAll()
props.pointData.map(item => {
if (item.checked) {
item.poi_list.map(pointItem => {
pointItem.panelType = item.value
const point = new Feature({
geometry: new Point(transform([pointItem.longitude, pointItem.latitude], 'EPSG:4326', 'EPSG:3857')),
data: pointItem
})
const imgSrc = require(`@/assets/img/map/icon_${item.value}.png`)
const iconStyle = new Style({
image: new Icon({
color: '#ffffff',
crossOrigin: 'anonymous',
src: imgSrc,
}),
})
point.setStyle(iconStyle)
mapPointList.push(point)
})
}
})
pointLayerSource = new VectorSource({features: mapPointList})
pointLayer = new VectorLayer({source: pointLayerSource})
mapObj.addLayer(pointLayer)
}
const delPointAll = () => {
if (pointLayerSource) {
mapPointList.map(item => {
pointLayerSource.removeFeature(item)
})
mapObj.removeLayer(pointLayer)
pointLayerSource = null
pointLayer = null
mapPointList = []
}
}
const addAreaPolygon = () => {
let geoJson = require('@/mock/zb.json')
const vectorSource = new VectorSource({
features: new GeoJSON({featureProjection: 'EPSG:3857'}).readFeatures(geoJson),
})
const layer = new VectorLayer({
source: vectorSource,
style: new Style({
stroke: new Stroke({
color: 'blue',
lineDash: [4],
width: 3,
}),
fill: new Fill({
color: 'rgba(0, 0, 0, 0.1)',
}),
}),
});
mapObj.addLayer(layer)
}
const wsDataInfo = inject('wsDataInfo')
watch(wsDataInfo, () => {
if (wsDataInfo.value) {
let data = JSON.parse(wsDataInfo.value.data)
const type = data.pushType + ''
console.log(data, 'p[p[[')
if (type === '2') {
addGpsPoint([data], false)
}
}
}, {immediate: true, deep: true})
const getGpsList = () => {
home.getGpsList().then(res => {
if (res.state === 0) {
}
})
}
let gpsPointList = []
let gpsPointLayerSource = null
let gpsPointLayer = null
const addGpsPoint = (data, del = true) => {
let pointList = []
data.map(item => {
const point = new Feature({
geometry: new Point(transform([item.longitude, item.latitude], 'EPSG:4326', 'EPSG:3857')),
gpsPointData: item
})
const imgSrc = require(`@/assets/img/map/gpsIcon.png`)
const iconStyle = new Style({
image: new Icon({
color: '#ffffff',
crossOrigin: 'anonymous',
src: imgSrc,
}),
})
point.setStyle(iconStyle)
pointList.push(point)
})
gpsPointList.push(...pointList)
if (!gpsPointLayerSource) {
gpsPointLayerSource = new VectorSource({features: gpsPointList})
gpsPointLayer = new VectorLayer({source: gpsPointLayerSource})
mapObj.addLayer(gpsPointLayer)
} else {
pointList.map(item => {
gpsPointLayerSource.addFeature(item)
})
}
}
const delGpsPointAll = () => {
if (gpsPointLayerSource) {
gpsPointList.map(item => {
gpsPointLayer.removeFeature(item)
})
mapObj.removeLayer(gpsPointLayer)
gpsPointLayerSource = null
gpsPointLayer = null
gpsPointList = []
}
}
onMounted(() => {
initMap()
})
}
}
</script>
<style lang="scss" scoped>
.map {
width: 100%;
height: 100%;
}
</style>
复制代码

也算是新手上路 边看文档编写,如果错误 或更好的写法 还请小伙伴们指出,谢谢!