前言
SpringBoot几乎是我们所有Java开发者必须掌握的一个技能,它为所有开发者更快的入门,做到开箱即用,没有冗余的代码和XML配置要求,对于开发者来说几乎是“零配置”。这个得益于SpringBoot的“约定大于配置”。
SpringBoot的starter帮我们把繁琐的配置和注册到IOC容器的过程都做了,我们只需要按照约定配置就可以开箱即用,实现零配置,下面我们就手撸一个spring-boot-starter来加深对“零配置”和“约定大于配置”的理解吧。
spring-boot-starter介绍
SpringBoot提供了一个方便我们开发者开发的环境,它的底层就是使用了starter机制,能够抛弃以前繁琐的配置,统一集成为starter。
开发者只需要把starter引入到你的pom.xml中,SpringBoot就会自动扫描要加载的信息并启动相应的默认配置。SpringBoot会自动通过classpath路径下的类发现需要的Bean,并注册到IOC容器中。
所有这些依赖的模块都遵循着约定成俗的默认配置,并允许我们修改配置信息,这就是SpringBoot的“约定大于配置”的理念。
手撸xxx-spring-boot-starter
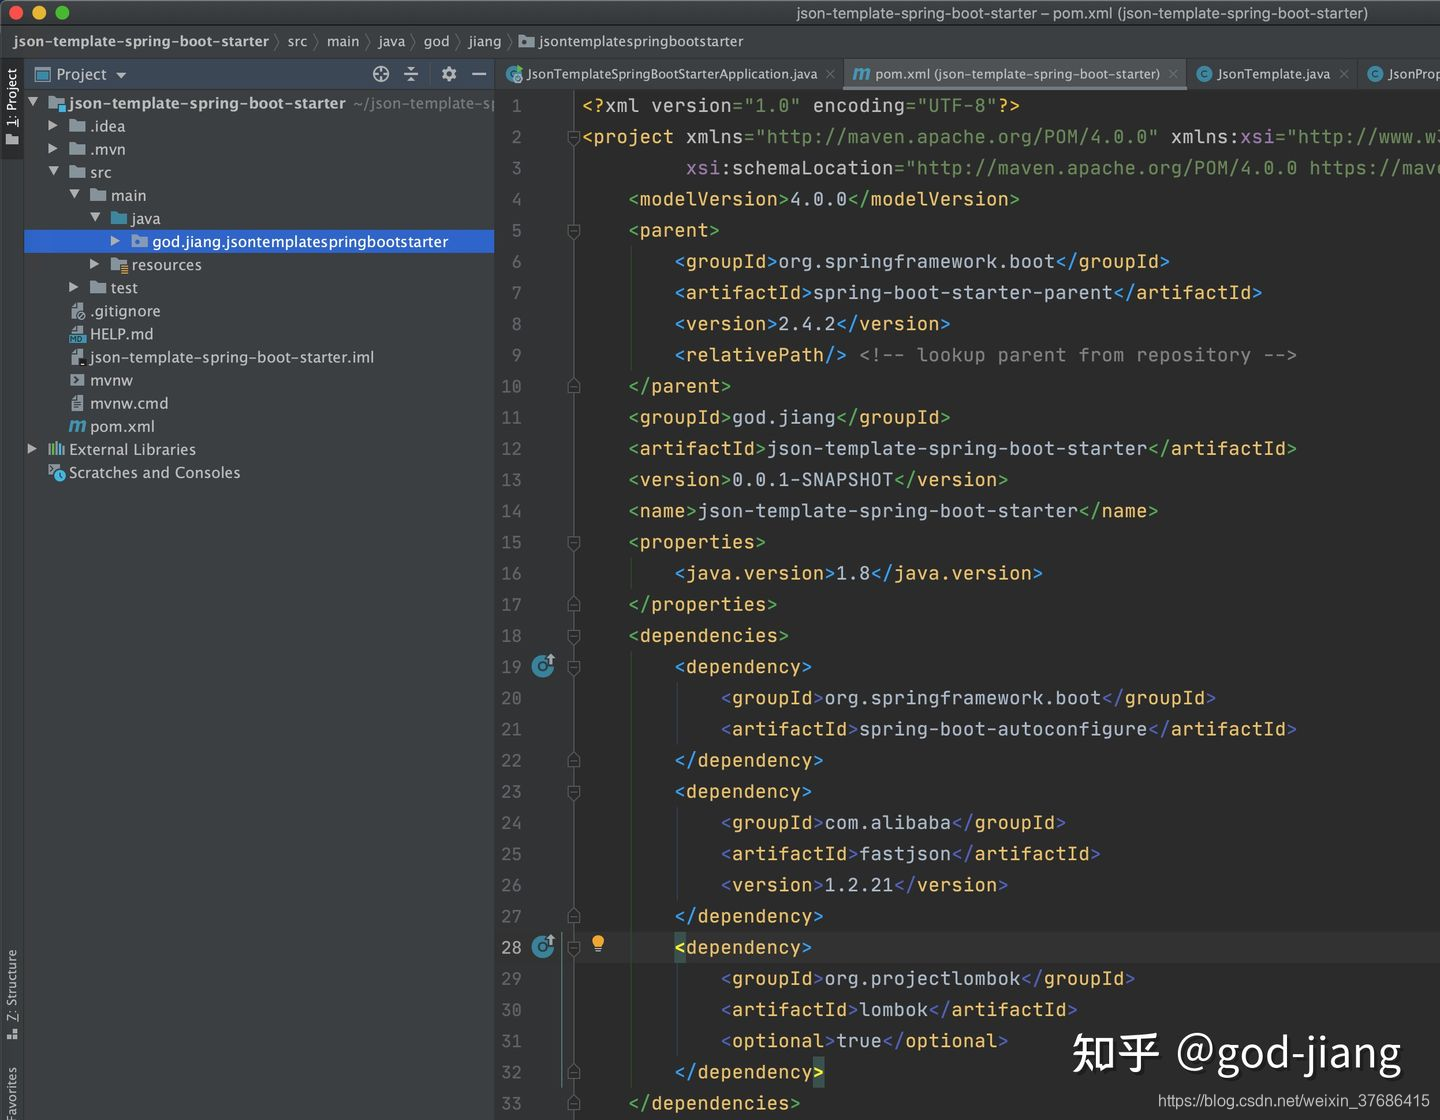
新建一个json-template-spring-boot-starter的SpringBoot项目,并引入fastjson依赖。
接着创建一个JsonTemplate,调用fastjson把一个对象转换为json字符串
package god.jiang.jsontemplatespringbootstarter;

import com.alibaba.fastjson.JSONObject;
import lombok.Data;

@Data
public class JsonTemplate {


    private String name;

    private String text;

    public String objToJsonString(Object object) {


        return this.getName() + this.getText() + JSONObject.toJSONString(object);
    }
}
接着创建spring-boot-starter的配置类(约定大于配置)
package god.jiang.jsontemplatespringbootstarter;

import org.springframework.boot.context.properties.ConfigurationProperties;

@ConfigurationProperties(prefix = "god.jiang.json")
public class JsonProperties {


    public String name = "god-jiang-json";

    public String text = "自定义spring-boot-starter把对象转换成json";

    public String getName() {


        return name;
    }

    public void setName(String name) {


        this.name = name;
    }

    public String getText() {


        return text;
    }

    public void setText(String text) {


        this.text = text;
    }
}
接着创建自动配置类,让springboot自动扫描并且注入到IOC容器中
package god.jiang.jsontemplatespringbootstarter;


import org.springframework.beans.factory.annotation.Autowired;
import org.springframework.boot.autoconfigure.condition.ConditionalOnClass;
import org.springframework.boot.autoconfigure.condition.ConditionalOnMissingBean;
import org.springframework.boot.context.properties.EnableConfigurationProperties;
import org.springframework.context.annotation.Bean;
import org.springframework.context.annotation.Configuration;

@Configuration
@ConditionalOnClass({

    JsonTemplate.class})
@EnableConfigurationProperties(JsonProperties.class)
public class JsonTemplateAutoConfiguration {


    @Autowired
    private JsonProperties jsonProperties;

    @Bean
    @ConditionalOnMissingBean(JsonTemplate.class)
    public JsonTemplate jsonTemplate(){


        JsonTemplate jsonTemplate = new JsonTemplate();
        jsonTemplate.setName(jsonProperties.getName());
        jsonTemplate.setText(jsonProperties.getText());
        return jsonTemplate;
    }
}
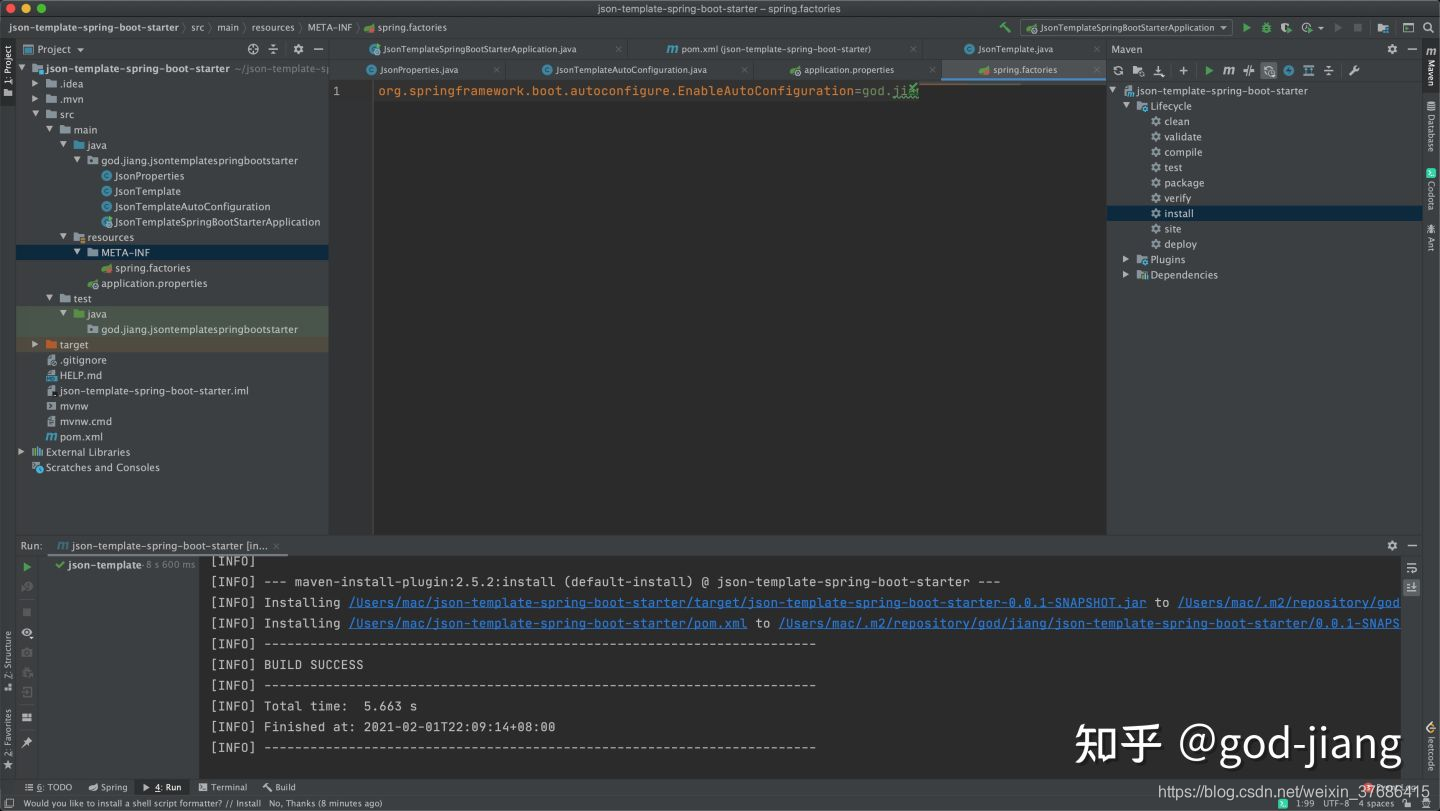
上面做完了,最关键的一步把自动配置的类写在resource/META-INF/spring.factories文件中
org.springframework.boot.autoconfigure.EnableAutoConfiguration=god.jiang.jsontemplatespringbootstarter.JsonTemplateAutoConfiguration
然后用maven命令install和deploy到远程仓库,方便以后项目可以调用该starter。
使用我们上面所创建的spring-boot-starter
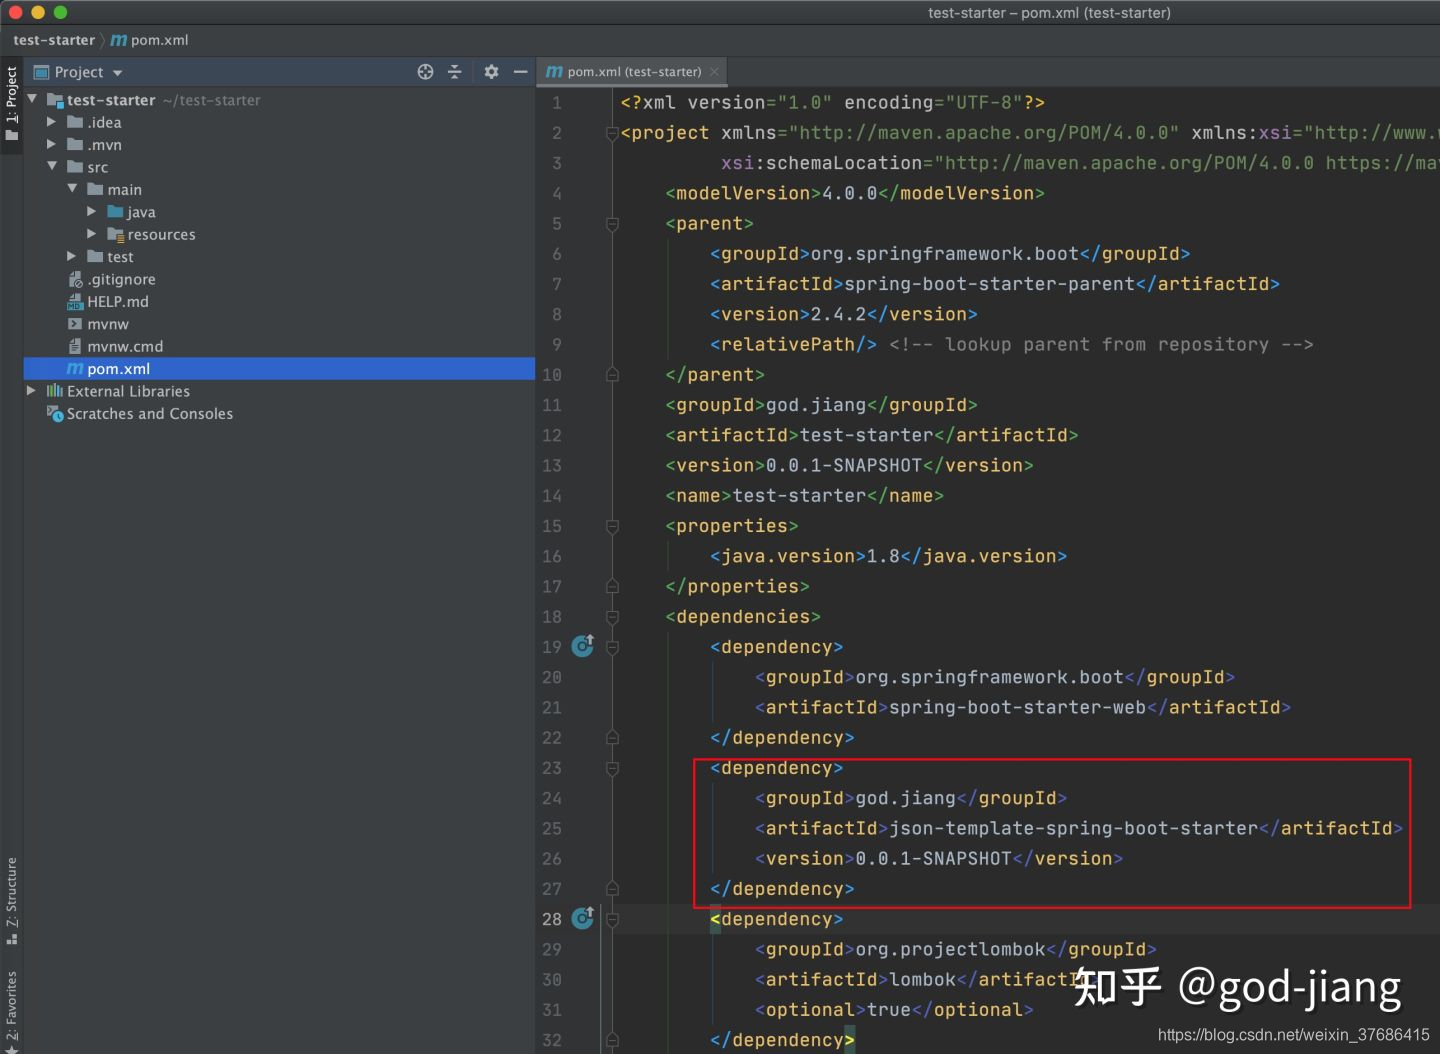
创建一个新的SpringBoot项目,在pom.xml中引入上面编写的json-template-spring-boot-starter
接着创建一个controller调用json-template-spring-boot-starter的objToJsonString方法
package god.jiang.teststarter;

import god.jiang.jsontemplatespringbootstarter.JsonTemplate;
import org.springframework.beans.factory.annotation.Autowired;
import org.springframework.web.bind.annotation.RequestMapping;
import org.springframework.web.bind.annotation.RestController;

@RestController
public class Controller {


    @Autowired
    private JsonTemplate jsonTemplate;

    @RequestMapping("/toJson")
    public String toJson(){


        GodJiang godJiang = new GodJiang();
        godJiang.setName("god-jiang");
        godJiang.setAge(18);
        godJiang.setText("自定义一个spring-boot-starter");
        return jsonTemplate.objToString(godJiang);
    }
}
按照约定配置application.properties
god.jiang.json.name=god-jiang
god.jiang.json.text=-study-spring-boot-starter
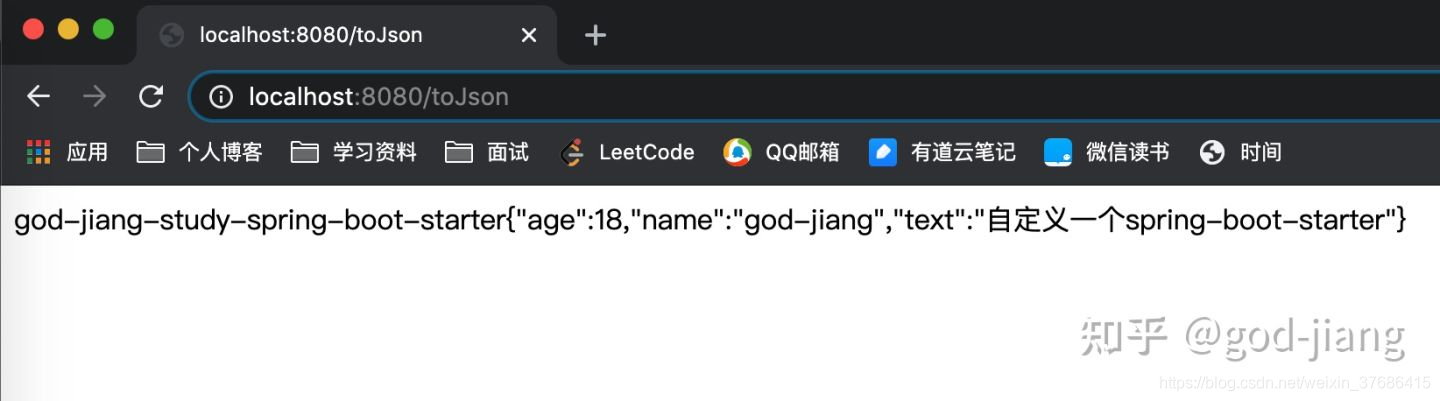
启动项目运行访问localhost:8080/toJson
总结
以上就是手写一个spring-boot-starter的过程,实际上读完springboot的自动加载源码我就大概知道整个加载的过程,这次接着手写starter来实现整个过程,让我对springboot源码有了更深的理解,希望以上的分享对你们有所帮助~~~