‘’xml布局转换为view对象‘’一碰到这个需求时我们心中的思路就来了,简直小case。安卓提供的api:View的inflate方法、LayoutInflater的inflate方法都可以快速的完成我们的需求。然而生活并不是一帆风顺的哈,我们在recyclerview中使用时或者在fragment中使用时或许会碰到这样的问题:
1、布局参数获取不到,项目有时直接崩溃了。
2、崩溃报错:子view已经有了父布局,你要想为这个view指定父布局,必须先在view的父布局中先删除子view。(java.lang.IllegalStateException: The specified child already has a parent. You must call removeView() on the child’s parent first.)
一碰到问题我们或许就想到了度娘、google然后参考参考别人的说法,改了改inflate方法传入的参数,竟然神奇的好了,然而你真的熟悉inflate吗?这里我们就总结下。
知识点
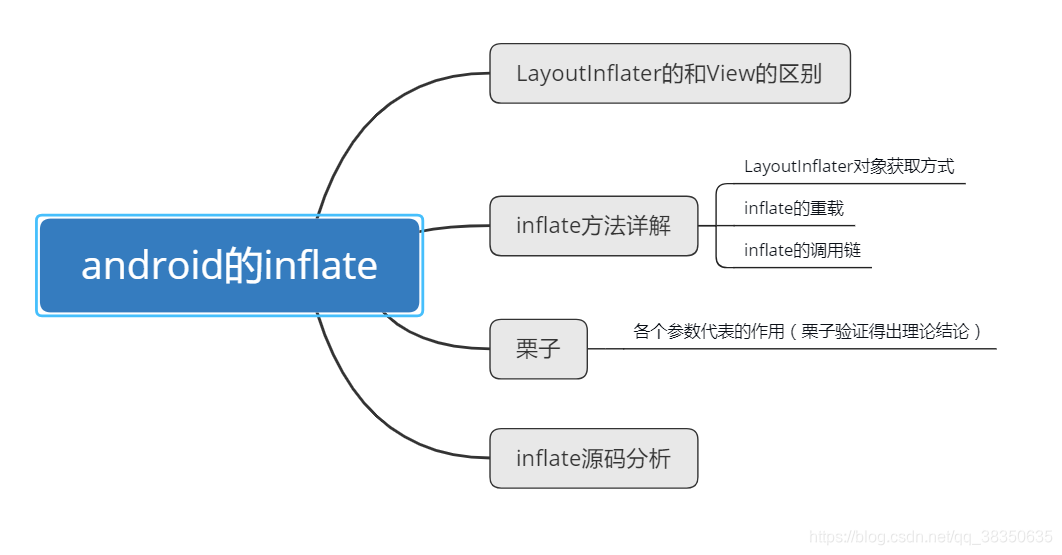
LayoutInflater的和View的区别
二者之间其实是有关系的,看下源码的方法调用我们立刻就明白了。(贼简单的。。。。)
(1)平时使用
View.inflate(mContext, R.layout.layout_recyclerview_item, null)
看到上面代码我们就感到亲切吧!经常使用。接下来我们就进入inflate方法看看:
(2)View的inflate方法源码
 public static View inflate(Context context, @LayoutRes int resource, ViewGroup root) {


        LayoutInflater factory = LayoutInflater.from(context); // 调用了LayoutInflater的from方法获得LayoutInflater对象
        return factory.inflate(resource, root); // 调用了LayoutInflater对象的inflate方法(两个参数的)
    }
源码太简单了吧!这是源码吗?嘿嘿先看到这,我们这里只需要明白二者的关系即可,inflate方法的几个重载,参数的不同意义我们稍后具体分析。。。
(3)结论
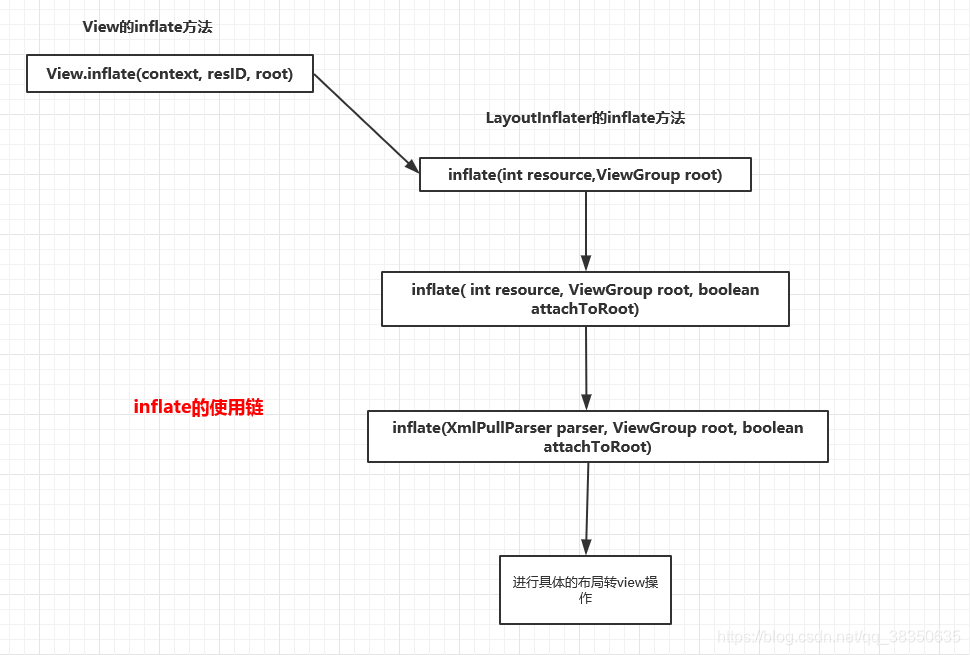
View的inflate方法底层调用的就是 LayoutInflater的两个参数的inflate方法。
二、inflate方法详解
通过View的inflate方法源码观看,我们了解到这个inflate方法是个静态的,直接类名就可以使用,然而LayoutInflater的inflate方法使用却需要对象调用。这时如何获得LayoutInflater对象呢?google工程师提供了三种方式。如下:
1、LayoutInflater对象的获取
         //方式1:
        LayoutInflater layoutInflater = getLayoutInflater();
          //方式2:
        LayoutInflater layoutInflater = LayoutInflater.from(this);
          //方式3:
        LayoutInflater layoutInflater = (LayoutInflater) this.getSystemService(LAYOUT_INFLATER_SERVICE);
以上三种方式都可以获得LayoutInflater 对象。习惯上方式1使用不多,我们平时使用最多的是方式2。对于方式3的写法感觉还是有点逼格的。因为方式1、方式2的底层就是调用了方式3(参看下文源码分析)。按照方式3的写法有水平的工程师一看就会发现,哎,你这小伙子不错!阅读过源码,善于模仿。。。。
ps:三者如何选择我们根据自己的习惯即可。
2、inflate的重载与调用链
其实inflate的重载方法有很多,但是我们无论调用哪个方法,最终都是调用了特定参数的方法(参看下文源码)
(1)特定参数栗子
就以我们平时写的自定义view举个栗子吧,如下:
/**
 * Created by sunnyDay on 2019/9/4 20:34
 */
public class MyCustomView extends View {


    public MyCustomView(Context context) {


        this(context,null);
    }

    public MyCustomView(Context context, AttributeSet attrs) {


        this(context, attrs,0);
    }

    /**
     * 用户无论调用哪个方法,最终都会使用这个方法处理。
     * */
    public MyCustomView(Context context, AttributeSet attrs, int defStyleAttr) {


        super(context, attrs, defStyleAttr);
    }
}
(2)inflate的重载方法
1、View	inflate(int resource, ViewGroup root)

2、View	inflate(int resource, ViewGroup root, boolean attachToRoot)

3、View	inflate(XmlPullParser parser, ViewGroup root)

4、View	inflate(XmlPullParser parser, ViewGroup root, boolean attachToRoot)
如上四个方法,我们通常使用的是方法1,方法2。
1、方法1就是上文View的inflate方法内部调用的。
2、我们使用LayoutInflater 的inflate方法时一般都是使用方法2
(3)观察源码
既然View的inflate方法底层调用了LayoutInflater 的inflate(resource, root),我们就从这里看起。View inflate的源码如下:
public static View inflate(Context context, @LayoutRes int resource, ViewGroup root) {


        LayoutInflater factory = LayoutInflater.from(context);
        return factory.inflate(resource, root);
    }
----> ctrl+鼠标右键 进入factory.inflate(resource, root)
 public View inflate(@LayoutRes int resource, @Nullable ViewGroup root) {


        return inflate(resource, root, root != null);
    }
可以看到这里调用了三个参数的方法,三个参数的方法就是多了个boolean值参数,这个参数用于判断是否把布局转换后的view添加到root布局中。
可见我们使用View的inflate方法时,当传root为null时,这里的root != null不成立,故这里调用三个参数的方法时这里的值就为false了。相当于调用了inflate(resource, root, false)
----> ctrl+鼠标右键 继续深入观看三个参数的源码
  public View inflate(@LayoutRes int resource, @Nullable ViewGroup root, boolean attachToRoot) {


         //1、首先根据用户传的Context 获得Resources对象
        final Resources res = getContext().getResources();
        if (DEBUG) {


            Log.d(TAG, "INFLATING from resource: \"" + res.getResourceName(resource) + "\" ("
                    + Integer.toHexString(resource) + ")");
        }
        // 2、根据用户传递进来的资源id 来获得xml资源解析器对象
        final XmlResourceParser parser = res.getLayout(resource);
        try {


        //3、吧布局转换为view
            return inflate(parser, root, attachToRoot);
        } finally {


            parser.close();
        }
    }
可以看到这里主要进行了3步:
1、首先根据用户传的Context 获得Resources对象
2、根据用户传递进来的资源id 来获得xml资源解析器对象
3、调用inflate(XmlPullParser parser, ViewGroup root, boolean attachToRoot)方法吧布局转换为view
ps:getLayout内部就是解析xml文件生成XmlResourceParser 对象的过程。
(4)inflate调用链
三、栗子
既然我们明白了调用链,那么最核心的方法就是inflate(int resource, ViewGroup root, boolean attachToRoot)三个参数的方法了,而三个参数的方法中resource是必须传递的,所以不用考虑。所以我们只需考虑root是否为null,attachToRoot为 true或者false即可。接下来便分情况来探究下。
几种情况
- root不为null,attachToRoot为true
- root不为null,attachToRoot为false
- root为null
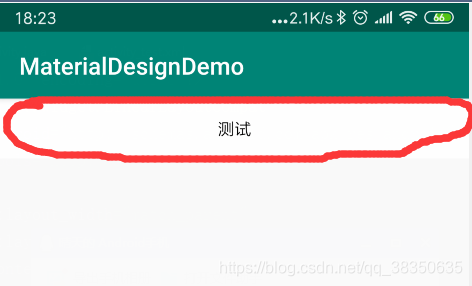
1、root不为null,attachToRoot为true
root不为null,attachToRoot为true:表示将指定的布局A添加到root容器中,添加过程中A布局的根节点的属性都是生效的。
(1)简单搞个activity
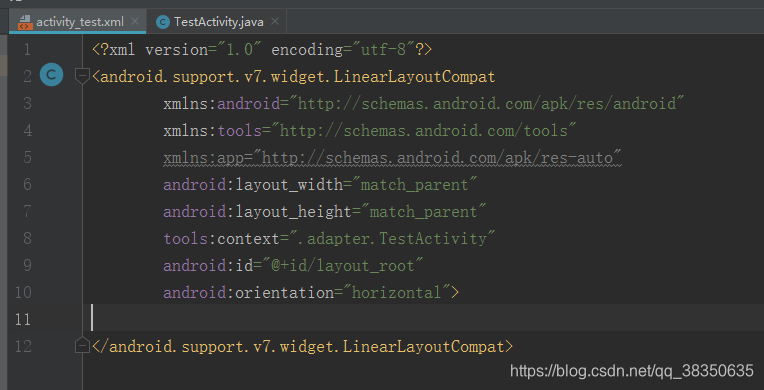
如上,创建个简单的activity,布局中只添加了个LinearLayoutCompat。
(2)再随便创建个布局文件(layout_mytest.xml如下)
<?xml version="1.0" encoding="utf-8"?>
<android.support.v7.widget.LinearLayoutCompat
        xmlns:android="http://schemas.android.com/apk/res/android"
        android:background="@color/colorAccent"
        android:id="@+id/my_test"
        android:layout_width="250dp"
        android:layout_height="250dp"
        android:orientation="vertical"
        android:gravity="center">

    <android.support.v7.widget.AppCompatTextView
            android:layout_width="50dp"
            android:layout_height="50dp"
            android:text="测试"
            android:background="#ffffff"
            android:textColor="#000000"
            android:gravity="center"/>

</android.support.v7.widget.LinearLayoutCompat>
(3)吧layout_mytest.xml 这个布局转换为view添加到TestActivity的布局容器中
public class TestActivity extends AppCompatActivity {


    @Override
    protected void onCreate(Bundle savedInstanceState) {


        super.onCreate(savedInstanceState);
        setContentView(R.layout.activity_test);

        LinearLayoutCompat layoutRoot = findViewById(R.id.layout_root);  // TestActivity根布局的View对象

        LayoutInflater inflater = LayoutInflater.from(this);
        View mView = inflater.inflate(R.layout.layout_mytest, layoutRoot, true);  // 布局转换为view

    }
}

可以看到我们获得了个mView对象,并没有进行 layoutRoot.addView(mView);然而神奇的一幕出现了,布局竟然加载到了我们指定的root容器中。其实attachToRoot的值就是控制是否把指定的布局加载到指定的root容器中,这里我们只要稍微修改下,吧true修改为false运行下,便会发现,布局没有加载成功。
(4)拓展—自己作死系列
如下:我们如果手贱,inflate 的第三个参数为true的情况下多写了句代码
   LinearLayoutCompat layoutRoot = findViewById(R.id.layout_root);  // TestActivity根布局的View对象

        LayoutInflater inflater = LayoutInflater.from(this);
        View mView = inflater.inflate(R.layout.layout_mytest, layoutRoot, true);  // 布局转换为view

        layoutRoot.addView(mView); //自作聪明 吧view添加到容器

跑不起来,直接炸了。。。因为inflater.inflate(R.layout.layout_mytest, layoutRoot, true)这句就表示吧指定的view添加到指定的root容器中。表示mView这个view有了个父容器layoutRoot ,此时我们再次调用layoutRoot (或者其他容器)添加mView就会出错了。其实这里有个解决方法,就是我们把上述代码的true变为false即可。就不崩溃了。
2、root不为null,attachToRoot为false
纳尼?root非空、attachToRoot为false上文不是一笔带过了吗?不就是不把指定的布局添加到root容器中。。。。我们或许还会疑问的,既然不添加到root中,我直接吧root置空不就行啦,然而事情都不是我们想象的那么简单。
(1)涉及到一个说法
一个控件只有处在一个容器中,这个控件的宽高等属性才是有意义的,才会生效。
所以上文中我们指定了root布局后无论是直接attachToRoot为true的方式添加view,还是attachToRoot 为false+ layoutRoot.addView(mView)方式添加view 。添加时我们指定的布局的根节点属性都是生效的。因为我们为他指定了父容器。
3、root为null时
当root为null时,attachToRoot为true或者false的效果是一样的。此时如果我们把xml布局A转换为view添加到容器中,A的根节点属性是不生效的。
   LinearLayoutCompat layoutRoot = findViewById(R.id.layout_root);  // TestActivity根布局的View对象

        LayoutInflater inflater = LayoutInflater.from(this);
        View mView = inflater.inflate(R.layout.layout_mytest, null, false);  // 布局转换为view

        layoutRoot.addView(mView);
(1)父布局失效
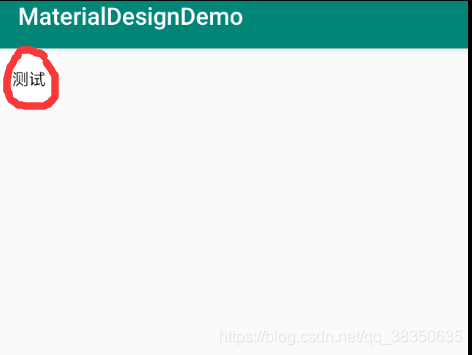
(2)子 view 属性修改
<?xml version="1.0" encoding="utf-8"?>
<android.support.v7.widget.LinearLayoutCompat
        xmlns:android="http://schemas.android.com/apk/res/android"
        android:background="@color/colorAccent"
        android:id="@+id/my_test"
        android:layout_width="250dp"
        android:layout_height="250dp"
        android:orientation="vertical"
        android:gravity="center">

<!--    宽度由之前的50 变为500 -->
    <android.support.v7.widget.AppCompatTextView
            android:layout_width="500dp"
            android:layout_height="50dp"
            android:text="测试"
            android:background="#ffffff"
            android:textColor="#000000"
            android:gravity="center"/>

</android.support.v7.widget.LinearLayoutCompat>
可以发现原来我们设置的根布局的宽高等属性(250dp、gravity)都失效了。还会发现我们修改AppCompatTextView的宽高时AppCompatTextView是生效的,因为AppCompatTextView处于父容器中。
四、 源码分析
其实不经意间,没忍住在介绍inflate方法的调用链时分析了部分源码,这里我们就接着分析核心部分。
     	/**
     	*
		*局部代码   部分有省略
		*/
	public View inflate(XmlPullParser parser, @Nullable ViewGroup root, boolean attachToRoot) {


        synchronized (mConstructorArgs) {


            View result = root; // 用户传递的root 赋值给result

					// 1、xml 布局转换为view
                    final View temp = createViewFromTag(root, name, inflaterContext, attrs);


                    ViewGroup.LayoutParams params = null; // 布局参数

                    // 2、用户传递的root view不为null时给指定的子view(temp)添加布局参数
                    if (root != null) {


                        params = root.generateLayoutParams(attrs);//生成布局参数的方法

                        if (!attachToRoot) {

    //当temp没有被添加到root时开始给temp 设置布局参数(添加过就不用设置了)

                            temp.setLayoutParams(params);
                        }
                    }


					// 3、root 不为null 且用户指定attachToRoot为 ture时,吧temp 添加到root中,告知root temp的布局参数信息。
                    if (root != null && attachToRoot) {


                        root.addView(temp, params);
                    }

                    if (root == null || !attachToRoot) {

     //root为null 或者用户attachToRoot 为false 时直接返回 用户指定布局的生成的 view: temp
                        result = temp;
                    }
                }

            return result;
        }
    }
可以看到这里主要做了这些处理:
1、xml 布局转换为view
2、用户传递的root view不为null时给指定的子view(temp)添加布局参数
3、root 不为null 且用户指定attachToRoot为 ture时,吧temp 添加到root中,告知root temp的布局参数信息。
end
经过一系列的探讨发现自己对inflate的认识真的加深了,有收获。快乐啦!!!