Cobbler实现最小化安装centos7实战
一:理论
centos7+cobbler+kickstart.
Cobbler自动化部署(系统详细).
二:cobbler实现全自动化装机实战
2.1cobbler服务器
[root@localhost ~]# yum -y install epel-release
[root@localhost ~]# yum install cobbler cobbler-web dhcp tftp-server pykickstart httpd rsync xinetd -y
cobbler #cobbler程序包
cobbler-web #cobbler的web服务包
pykickstart #cobbler检查kickstart语法错误
httpd #Apache web服务
dhcp #Dhcp服务
tftp #tftp服务
xinetd #诸多服务的超级守护进程,
[root@localhost ~]# cd /etc/cobbler/
[root@localhost cobbler]# ls
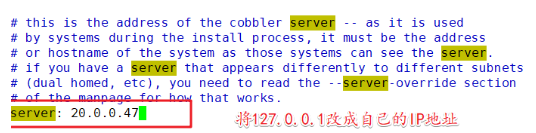
[root@localhost cobbler]# vim settings 修改配置文件
cobbler服务地址
指定PXE位置
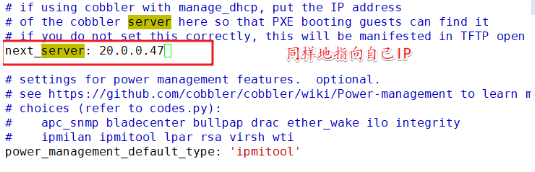
管理dhcp启动

[root@localhost cobbler]# systemctl start httpd.service
[root@localhost cobbler]# systemctl start cobblerd.service
[root@localhost cobbler]# systemctl status cobblerd.service 查看是否启动
[root@localhost cobbler]# systemctl stop firewalld.service
[root@localhost cobbler]# setenforce 0 必须关掉增强型安全功能
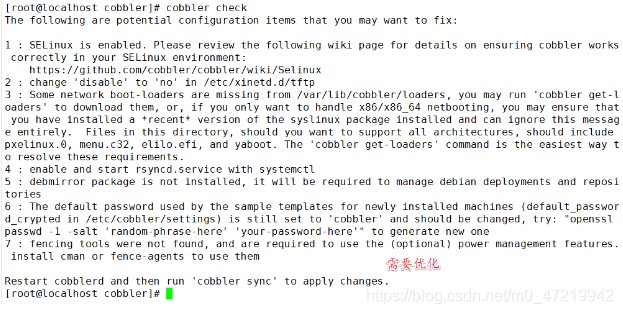
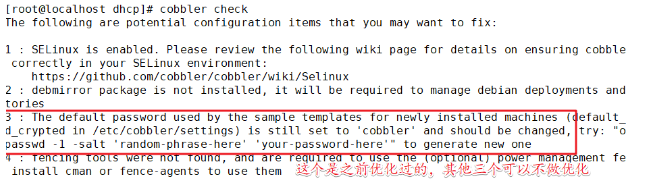
[root@localhost cobbler]# cobbler check 检查Cobbler的配置,进行优化
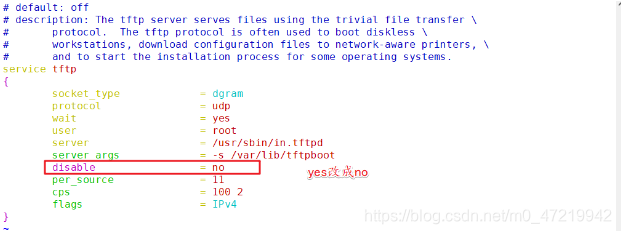
[root@localhost cobbler]# vim /etc/xinetd.d/tftp
[root@localhost cobbler]# systemctl enable rsyncd.service
[root@localhost cobbler]# systemctl restart cobblerd.service
[root@localhost cobbler]# cobbler check                 检查
[root@localhost cobbler]# openssl passwd -1 -salt 'abc123' 'abc123'    给对方装的密码
$1$abc123$9v8z2./E/PZihXrVcy3II0                              加密结果

[root@localhost cobbler]# systemctl start rsyncd
[root@localhost cobbler]# systemctl restart xinetd.service
[root@localhost cobbler]# vim dhcp.template                cobbler控制的dhcp服务

[root@localhost cobbler]# cobbler sync              帮助同步生成DHCP配置文件
[root@localhost dhcp]# cobbler get-loaders          下载引导操作系统文件
[root@localhost dhcp]# systemctl start dhcpd
[root@localhost dhcp]# systemctl start cobblerd
[root@localhost dhcp]# systemctl start xinetd
[root@localhost dhcp]# cobbler check    再次检查
[root@localhost dhcp]# mount /dev/sr0 /mnt
[root@localhost dhcp]# df -Th
[root@localhost dhcp]# cobbler import --path=/mnt --name=CentOS-7-x86_64 --arch=x86_64
[root@localhost dhcp]# cd /var/www/cobbler/ks_mirror/
[root@localhost ks_mirror]# ls

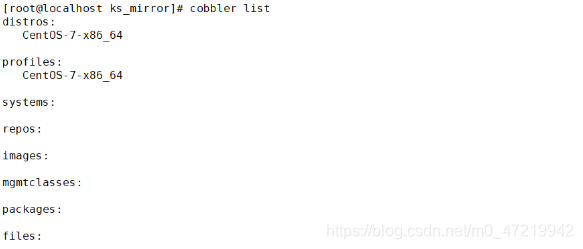
[root@localhost ks_mirror]# cobbler list 查看一下
[root@localhost ks_mirror]# yum install tree -y
[root@localhost ks_mirror]# tree /var/lib/tftpboot/images      查看内核和引导文件

[root@localhost ks_mirror]# systemctl restart cobblerd.service
[root@localhost ks_mirror]# systemctl restart dhcpd.service
[root@localhost ks_mirror]# systemctl restart xinetd.service
[root@localhost ks_mirror]# systemctl restart httpd.service
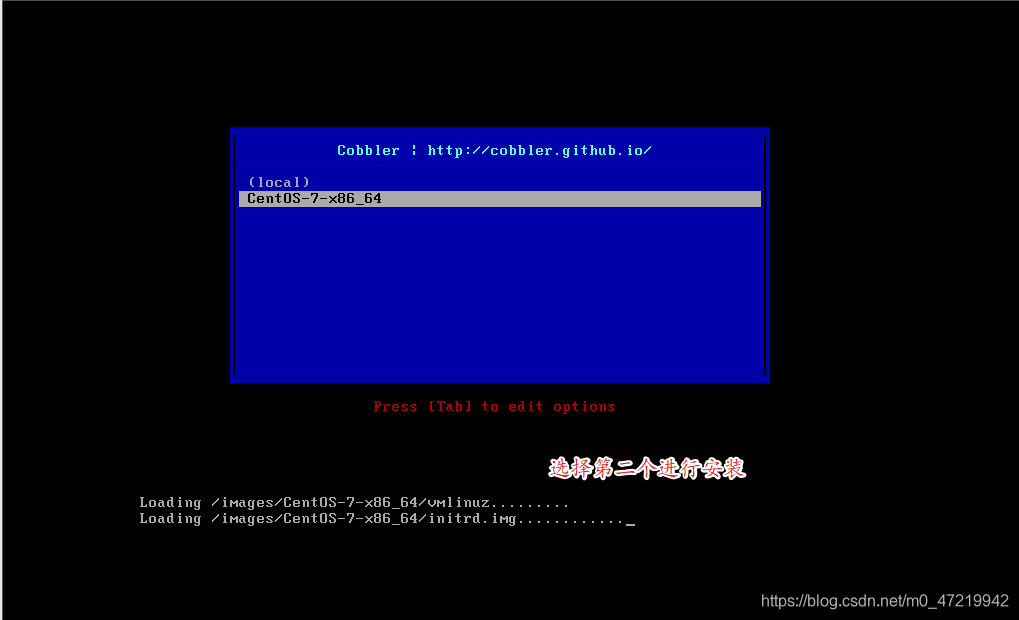
2.2:客户端
切换到裸机,开启
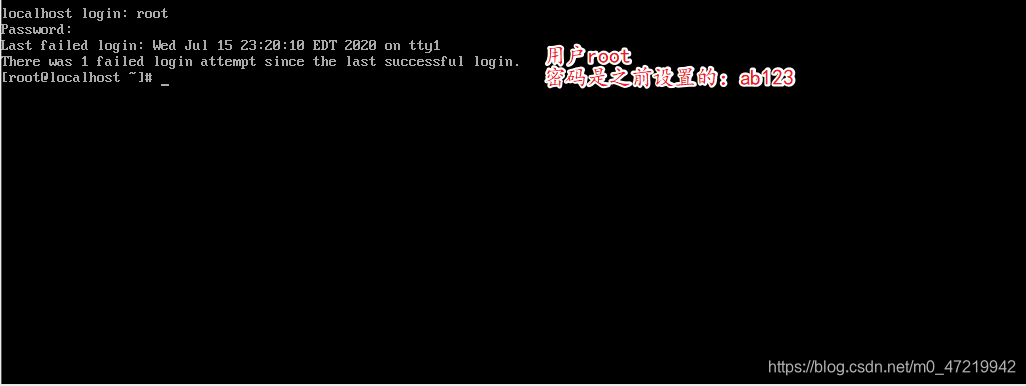
最小化安装装机成功