单文件上传
首先创建项目,开发工具是IDEA,选择Spring项目,勾选上Spring和SpringMVC。
然后命名,最后完成。
默认生成配置文件在web/WEB-INF下。
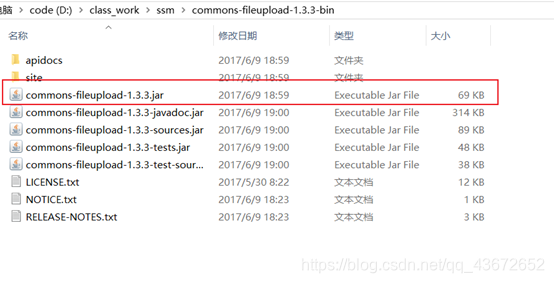
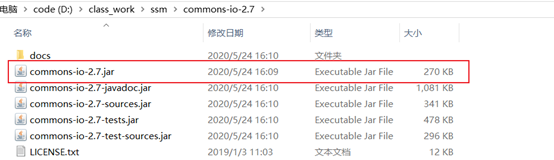
首先导入需要的jar包。

如果是创建的maven工程,导入以下依赖
<!-- https://mvnrepository.com/artifact/commons-fileupload/commons-fileupload -->
<dependency>
    <groupId>commons-fileupload</groupId>
    <artifactId>commons-fileupload</artifactId>
    <version>1.3.3</version>
</dependency>
<!-- https://mvnrepository.com/artifact/commons-io/commons-io -->
<dependency>
    <groupId>commons-io</groupId>
    <artifactId>commons-io</artifactId>
    <version>2.7</version>
</dependency>
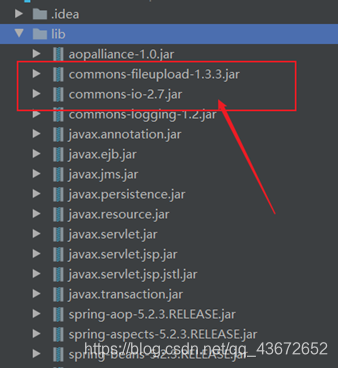
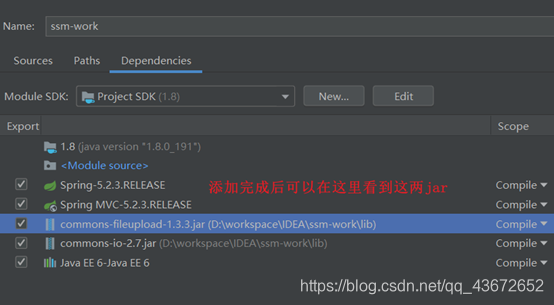
然后添加都本项目的依赖中。
开始修改配置。
Web.xml文件,配置如下:
<?xml version="1.0" encoding="UTF-8"?>
<web-app xmlns="http://xmlns.jcp.org/xml/ns/javaee"
         xmlns:xsi="http://www.w3.org/2001/XMLSchema-instance"
         xsi:schemaLocation="http://xmlns.jcp.org/xml/ns/javaee http://xmlns.jcp.org/xml/ns/javaee/web-app_4_0.xsd"
         version="4.0">
    <context-param>
        <param-name>contextConfigLocation</param-name>
        <param-value>/WEB-INF/applicationContext.xml</param-value>
    </context-param>
    <listener>
        <listener-class>org.springframework.web.context.ContextLoaderListener</listener-class>
    </listener>
    <servlet>
        <servlet-name>dispatcher</servlet-name>
        <servlet-class>org.springframework.web.servlet.DispatcherServlet</servlet-class>
        <load-on-startup>1</load-on-startup>
    </servlet>
    <servlet-mapping>
        <servlet-name>dispatcher</servlet-name>
        <url-pattern>/</url-pattern>
    </servlet-mapping>
</web-app>
配置dispatcher-servlet.xml
<?xml version="1.0" encoding="UTF-8"?>
<beans xmlns="http://www.springframework.org/schema/beans"
       xmlns:xsi="http://www.w3.org/2001/XMLSchema-instance" xmlns:mvc="http://www.springframework.org/schema/mvc"
       xmlns:context="http://www.springframework.org/schema/context"
       xsi:schemaLocation="http://www.springframework.org/schema/beans http://www.springframework.org/schema/beans/spring-beans.xsd http://www.springframework.org/schema/mvc https://www.springframework.org/schema/mvc/spring-mvc.xsd http://www.springframework.org/schema/context https://www.springframework.org/schema/context/spring-context.xsd">
    <bean class="org.springframework.web.multipart.commons.CommonsMultipartResolver" id="multipartResolver">
        <!--上传文件大小限制-->
        <property name="maxInMemorySize" value="1048576"></property>
        <!--字符编码-->
        <property name="defaultEncoding" value="UTF-8"></property>
    </bean>
    <bean id="nameViewResolver" class="org.springframework.web.servlet.view.BeanNameViewResolver">
        <property name="order" value="50"></property>
    </bean>

    <mvc:view-controller path="success" view-name="success"></mvc:view-controller>
    <mvc:view-controller path="index" view-name="index"></mvc:view-controller>
    <!--视图解析器-->
    <bean class="org.springframework.web.servlet.view.InternalResourceViewResolver" id="resolver">
        <property name="prefix" value="/ch10/"></property>
        <property name="suffix" value=".jsp"></property>
        <property name="order" value="0"></property>
    </bean>
    <!--开启包扫描-->
    <context:component-scan base-package="com.springmvc" annotation-config="true"/>
    <!--解析注解-->
    <mvc:annotation-driven/>

</beans>
因为在dispatcher-servlet.xml中视图解析器解析的是ch10开头的文件,并且后缀名是.jsp结尾。因此需要在web文件夹下创建ch10文件夹,之后的index.jsp和success.jsp都放在这里。
index.jsp
<html>
<head>
    <title>文件上传</title>
</head>
<body>
<form method="POST" enctype="multipart/form-data" action="/fileUpload">
    选择文件: <input type="file" name="file"><br/>
    <br/>
    <input type="submit" value="提交">
</form>
</body>
</html>
里面没什么内容简单的一个表单,需要注意的是文件上传的请求方式必须是以POST提交表单。请求的路径是/fileUpload。
success.jsp
<html>
<head>
<title>文件上传成功</title>
</head>
<body>
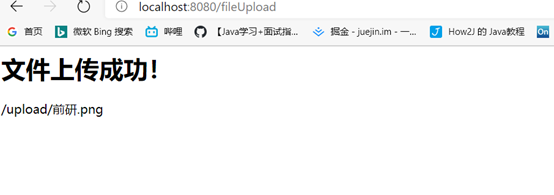
<h1>文件上传成功!</h1>
${fileUrl}
</body>
</html>
如果文件上传成功就跳转到success.jsp这个页面,显示文件上传成功,并显示文件的路径。
最后在src文件夹下创建controller包,并创建FileUploadController.java。
@Controller
public class FileUploadController {
@RequestMapping("/fileUpload")
public String fileUpload(@RequestParam(value = "file", required = false) MultipartFile file, HttpServletRequest request, ModelMap model) {
//服务端文件夹物理路径
String realPath = request.getSession().getServletContext().getRealPath("upload");
//获取文件名
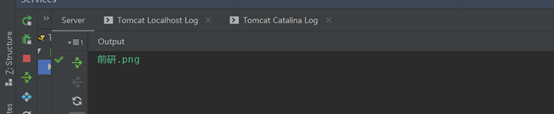
String filename = file.getOriginalFilename();
System.out.println(filename);
//创建一个File对象表示目标文件
File file1 = new File(realPath,filename);
//如果目标路径不存在就创建
if (!file1.exists()){
file1.mkdirs();
}
//上传文件到指定目录
try {
file.transferTo(file1);
} catch (IOException e) {
e.printStackTrace();
}
model.put("fileUrl",request.getContextPath()+"/upload/"+filename);
return "success";
}
}
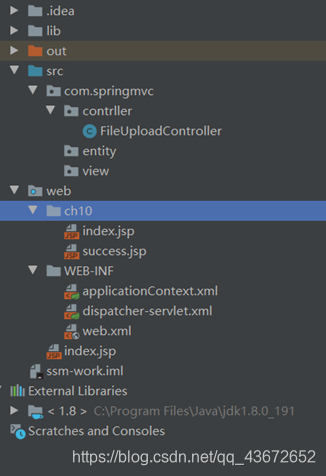
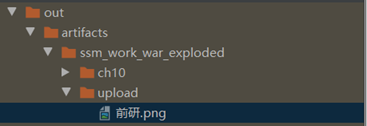
最后的项目结构是这样的。
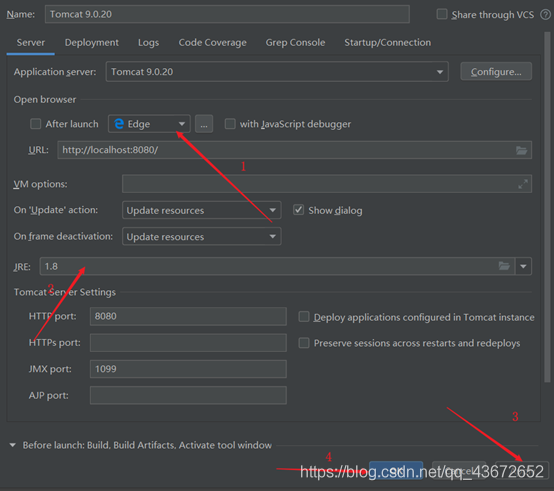
然后配置Tomcat,启动。
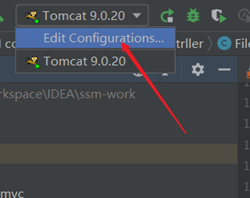
点左上角的 + 号。
选择tomcat在local下创建。之后配置启动时的浏览器

最后启动Tomcat。在浏览器中访问 localhost:8080/ch10
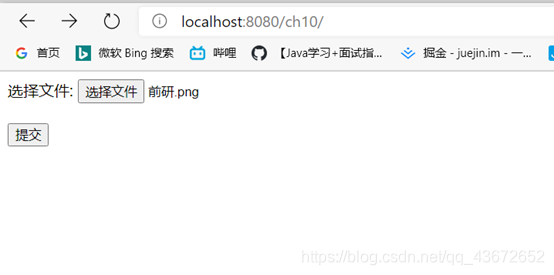
然后选择图片,图片最大为1M,最后点击提交。
同时控制台输出fileName
图片在以下目录下查看。
多文件上传
首先创建一个uploadFiles.jsp
<html>
<head>
    <title>多文件上传</title>
</head>
<body>
<form method="POST" enctype="multipart/form-data" action="/upload">

    文件描述:<input type="text" name="description"><br><br>
    选择文件: <input type="file" name="files" multiple="multiple"><br/><br>
    <br/>
    <input type="submit" value="提交">
</form>
</body>
</html>
然后在FileUploadController中写一个upload方法,用来处理多文件上传请求。
@RequestMapping("/upload")
    public String uploadFiles(@RequestParam String description, @RequestParam(value = "files", required = false) List<MultipartFile> files, HttpServletRequest request) {
        //判断文件是否存在
        if (!files.isEmpty() && files.size() > 0) {
            //遍历上传的多个文件
            for (MultipartFile file : files) {
                //获取上传的文件名
                String filename = file.getOriginalFilename();

                //获取上传的文件地址
                String dirPath = request.getServletContext().getRealPath("/upload/");
                File filePath = new File(dirPath);
                //如果保存的文件地址不存在就创建
                if (!filePath.exists()) {
                    filePath.mkdirs();
                }
                //使用UUID重命名新文件
                String newFilename = description + UUID.randomUUID() + "_" + filename;
                try {
                    file.transferTo(new File(dirPath + newFilename));
                } catch (IOException e) {
                    e.printStackTrace();
                    //如果抛出异常就返回错误页面
                    return "error";
                }
            }
            //以上执行过程都没有问题就返回成功页面
            return "success";
        }


        return "error";
    }
启动tomcat服务器,输入localhost:8080/ch10/uploadFiles.jsp
选中多个文件,然后提交
这里选中多个文件是ctrl+鼠标左键,可以选中多个文件


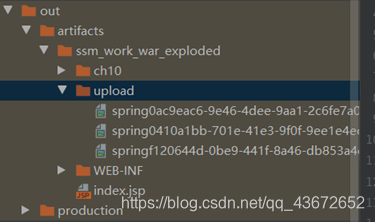
既然上传成功了那就到项目中去看看传到哪个文件夹下了
文件的下载
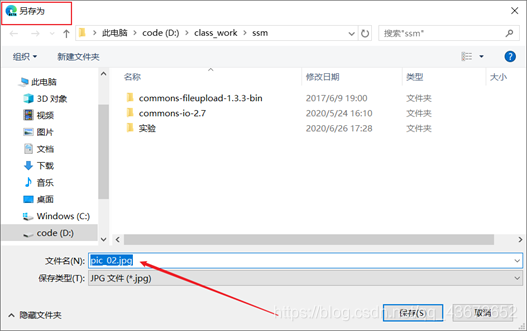
文件下载就是将服务器的文件下载到本地。服务端会在页面上面给出超链接,就可以实现文件下载了。但是如果超链接中包含中文有可能下载失败(这个Goole和Firefox就没事,不过IE和360就不知道了)。
在上传成功的jsp中添加一个超链接。
<a href="/fileDownload?fileName=${fileName}">${fileName}下载</a>
然后编写文件上传代码。
@RequestMapping("/fileDownload")
  public ResponseEntity<byte[]> fileDownload(HttpServletRequest request, @RequestParam String fileName, Model model) throws Exception {

        //下载文件路径
        String realPath = request.getServletContext().getRealPath("/upload/");
        //创建文件对象
        File file = new File(realPath+File.separator+fileName);

        //设置响应头
        HttpHeaders headers = new HttpHeaders();
        //解决中文乱码问题
        String downloadFileName = new String(fileName.getBytes(),"ISO-8859-1");
        //通知浏览器下载文件
        headers.setContentDispositionFormData("attachment",downloadFileName);
        //以二进制文件流的形式下载文件数据
        headers.setContentType(MediaType.APPLICATION_OCTET_STREAM);
        //返回封装后的下载数据
        return new ResponseEntity<byte[]>(FileUtils.readFileToByteArray(file),headers, HttpStatus.CREATED);
}
最后开启服务器,测试一下
访问localhost:8080/ch10/
然后选择单个文件上传,上传成功后会显示如下界面。
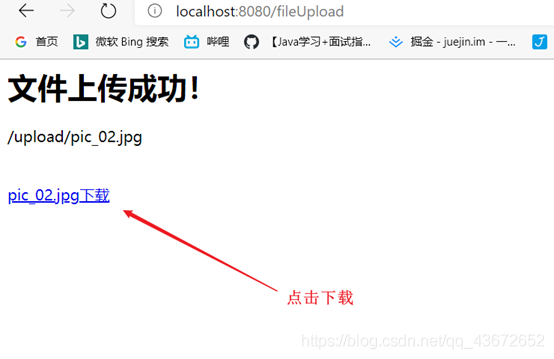

至此文件下载完成。
以上有不对的地方欢迎指出,分享想法,一起nb!