基于Spring框架访问数据库,都需要配置对数据源的引用,建立对数据库访问的连接。
这里主要给出两种方式:①基于JDBC的数据源配置注入 ②基于连接池(C3P0)数据源的配置注入
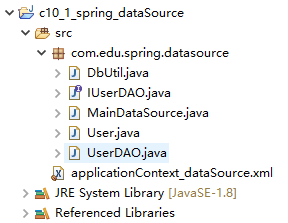
案例一:利用Spring框架,并基于JDBC数据源注入方式,实现对数据库的访问,完成在数据库表中插入和查询数据(假设使用MySQL数据库)。
步骤:
- 建立工程,并搭建环境,导入jar包
- 创建配置文件applicationContext_dataSource.xml。在配置文件内添加“数据源配置”
- 编写获取数据库连接对象与关闭数据库连接的工具类
- 编写JavaBean(User.java)
- 编写DAO接口(IUserDAO.java),该接口声明了两个方法:插入数据库方法和查询数据库方法。
- 编写接口IUserDAO的实现类UserDAO.java
- 修改配置文件,添加对业务DAO的注入
在该配置中共注入配置了3个Bean,它们之间存在依赖注入关系:“dataSource" ← "dbUtil" ← "userDao"
- 设计测试主程序
- 运行主程序
代码:
(1)DbUtil.java
package com.edu.spring.datasource;

import java.sql.Connection;
import java.sql.PreparedStatement;
import java.sql.ResultSet;
import java.sql.SQLException;

import javax.sql.DataSource;

public class DbUtil {
	private DataSource dataSource;//声明接口属性,用户获取数据连接对象

	public DataSource getDataSource() {
		return dataSource;
	}

	public void setDataSource(DataSource dataSource) {
		this.dataSource = dataSource;
	}
	public Connection getConnection(){
		Connection conn=null;
		try {
			conn=dataSource.getConnection();//获取数据连接对象
		} catch (SQLException e) {
			e.printStackTrace();
		}
		return conn;
	}
	public void close(Connection conn,PreparedStatement pstmt,ResultSet rs){
		if(rs!=null){
			try {
				rs.close();
			} catch (SQLException e) {
				e.printStackTrace();
			}
		}
		if(pstmt!=null){
			try {
				pstmt.close();
			} catch (SQLException e) {
				e.printStackTrace();
			}
		}
		if(conn!=null){
			try {
				conn.close();
			} catch (SQLException e) {
				e.printStackTrace();
			}
		}
	}
}

(2)User.java
package com.edu.spring.datasource;

public class User {
	private Integer id;
	private String name;
	private int age;

	public User() {}

	public User(Integer id, String name, int age) {
		this.id = id;
		this.name = name;
		this.age = age;
	}

	public Integer getId() {
		return id;
	}

	public void setId(Integer id) {
		this.id = id;
	}

	public String getName() {
		return name;
	}

	public void setName(String name) {
		this.name = name;
	}

	public int getAge() {
		return age;
	}

	public void setAge(int age) {
		this.age = age;
	}

}

(3)IUserDAO.java
package com.edu.spring.datasource;

public interface IUserDAO {
	public void insert(User user);//将对象user插入数据库
	public User find(String name);//根据姓名查找一个用户
}

(4)UserDAO.java
package com.edu.spring.datasource;
import java.sql.Connection;
import java.sql.PreparedStatement;
import java.sql.ResultSet;
import java.sql.SQLException;

public class UserDAO implements IUserDAO {
	DbUtil dbUtil;

	public DbUtil getDbUtil() {
		return dbUtil;
	}

	public void setDbUtil(DbUtil dbUtil) {
		this.dbUtil = dbUtil;
	}

	@Override
	public void insert(User user) {
		Connection conn=dbUtil.getConnection();
		PreparedStatement stmt=null;
		String sql="insert into user(name,age) values(?,?)";
		try {
			stmt=conn.prepareStatement(sql);
			stmt.setString(1, user.getName());
			stmt.setInt(2, user.getAge());
			stmt.executeUpdate();
		} catch (SQLException e) {
			e.printStackTrace();
		}finally{
			dbUtil.close(conn, stmt,null);
		}
	}

	@Override
	public User find(String name) {
		Connection conn=dbUtil.getConnection();
		PreparedStatement stmt=null;
		ResultSet rs=null;
		User user=new User();
		String sql="select * from user where name=?";
		try {
			stmt=conn.prepareStatement(sql);
			stmt.setString(1, name);
			rs=stmt.executeQuery();
			if(rs.next()){
				user.setId(rs.getInt("id"));
				user.setName(rs.getString("name"));
				user.setAge(rs.getInt("age"));
			}
		} catch (SQLException e) {
			e.printStackTrace();
		}finally{
			dbUtil.close(conn, stmt,rs);
		}
		return user;
	}

}


(5)applicationContext_dataSource.xml
<?xml version="1.0" encoding="UTF-8"?>
<beans xmlns="http://www.springframework.org/schema/beans"
	xmlns:xsi="http://www.w3.org/2001/XMLSchema-instance"
	xsi:schemaLocation="http://www.springframework.org/schema/beans http://www.springframework.org/schema/beans/spring-beans.xsd">

	<!-- 配置DataSource数据源 -->
	<bean id="dataSource"
		class="org.springframework.jdbc.datasource.DriverManagerDataSource">
		<property name="username" value="root"></property>
		<property name="password" value="123456"></property>
		<property name="url" value="jdbc:mysql://localhost:3306/ch10_db_1and2and3"></property>
		<property name="driverClassName" value="com.mysql.jdbc.Driver"></property>
	</bean>
	<bean id="userDao" class="com.edu.spring.datasource.UserDAO">
	    <property name="dbUtil"  ref="dbUtil"></property>
	</bean>
	<bean id="dbUtil" class="com.edu.spring.datasource.DbUtil">
	    <property name="dataSource"  ref="dataSource"></property>
	</bean>
</beans>

(6)MainDataSource.java
package com.edu.spring.datasource;

import org.springframework.context.ApplicationContext;
import org.springframework.context.support.ClassPathXmlApplicationContext;

public class MainDataSource {
	public static void main(String[] args) {
		ApplicationContext ctx = new ClassPathXmlApplicationContext("applicationContext_dataSource.xml");
		IUserDAO userDao=(UserDAO)ctx.getBean("userDao");
		User user=new User();
		user.setName("张三1");
		user.setAge(20);
		userDao.insert(user);
		System.out.println("插入完成!");
		User user2=userDao.find("张三1");
		if(user2!=null){
			System.out.println("查询到的信息为:序号:"+user2.getId()+"   姓名:"+user2.getName()+"  年龄:"+user2.getAge());
		}else{
			System.out.println("没有查询到!");
		}
	}
}
案例二:采用C3P0连接池技术,重新设计案例一的程序
分析:设计思想及方法与上面的相同,只将配置文件中关于数据源的配置改为支持C3P0具有连接池数据源即可。
<?xml version="1.0" encoding="UTF-8"?>
<beans xmlns="http://www.springframework.org/schema/beans"
	xmlns:xsi="http://www.w3.org/2001/XMLSchema-instance"
	xsi:schemaLocation="http://www.springframework.org/schema/beans http://www.springframework.org/schema/beans/spring-beans.xsd">

	<!-- 配置C3P0数据源 -->
	<bean id="dataSource"
		class="com.mchange.v2.c3p0.ComboPooledDataSource">
		<property name="user" value="root"></property>
		<property name="password" value="123456"></property>
		<property name="jdbcUrl" value="jdbc:mysql://localhost:3306/ch10_db_1and2and3"></property>
		<property name="driverClass" value="com.mysql.jdbc.Driver"></property>
	</bean>
	<bean id="userDao" class="com.edu.spring.datasource.UserDAO">
	    <property name="dbUtil"  ref="dbUtil"></property>
	</bean>
	<bean id="dbUtil" class="com.edu.spring.datasource.DbUtil">
	    <property name="dataSource"  ref="dataSource"></property>
	</bean>
</beans>
案例三:采用”属性文件“与”C3P0“连接池技术,重新设计上面的程序
分析:在案例一的基础上只需要修改两步即可,其余不用修改
- 创建属性文件db.properties,并给出”有关属性“及“属性值”
- 修改Spring配置文件,实现从属性文件内获取配置信息并注入给数据源
(1)db.properties
jdbc.user=root
jdbc.password=123456
jdbc.driverClass=com.mysql.jdbc.Driver
jdbc.jdbcUrl=jdbc:mysql:///ch10_db_1and2and3

jdbc.initPoolSize=5
jdbc.maxPoolSize=10

(2)applicationContext_dataSource_C3P0_file.xml
<?xml version="1.0" encoding="UTF-8"?>
<beans xmlns="http://www.springframework.org/schema/beans"
	xmlns:xsi="http://www.w3.org/2001/XMLSchema-instance"
	xmlns:context="http://www.springframework.org/schema/context"
	xsi:schemaLocation="http://www.springframework.org/schema/beans http://www.springframework.org/schema/beans/spring-beans.xsd
		http://www.springframework.org/schema/context http://www.springframework.org/schema/context/spring-context-4.0.xsd">

	<!-- 导入资源文件 -->
	<context:property-placeholder location="classpath:db.properties"/>

	<!-- 配置 C3P0 数据源 -->
	<bean id="dataSource"
		class="com.mchange.v2.c3p0.ComboPooledDataSource">
		<property name="user" value="${jdbc.user}"></property>
		<property name="password" value="${jdbc.password}"></property>
		<property name="jdbcUrl" value="${jdbc.jdbcUrl}"></property>
		<property name="driverClass" value="${jdbc.driverClass}"></property>
	</bean>
	<bean id="userDao" class="com.edu.spring.datasource.UserDAO">
	    <property name="dbUtil"  ref="dbUtil"></property>
	</bean>
	<bean id="dbUtil" class="com.edu.spring.datasource.DbUtil">
	    <property name="dataSource"  ref="dataSource"></property>
	</bean>

</beans>
