1. 使用 html-webpack-externals-plugin 插件
安装 html-webpack-externals-plugin
yarn add html-webpack-externals-plugin配置 webpack.config.js(配置完之后页面自动引入)
演示使用CDN 链接
const HtmlWebpackExternalsPlugin = require("html-webpack-externals-plugin");
module.exports = {
  plugins: [
    new HtmlWebpackExternalsPlugin({
      externals: [
        {
          module: "react",
          entry: "https://unpkg.com/react@16/umd/react.production.min.js",
          global: "React"
        },
        {
          module: "react-dom",
          entry:
            "https://unpkg.com/react-dom@16/umd/react-dom.production.min.js",
          global: "ReactDOM"
        }
      ]
    }),
  ],
};
抽离后打包对比
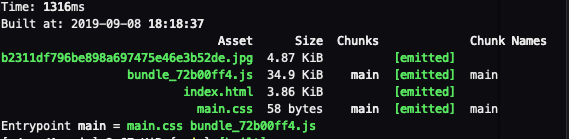
(抽离前)

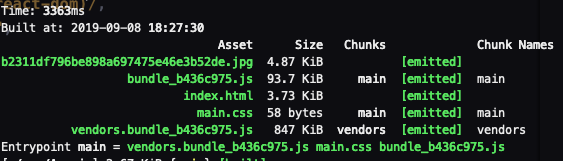
抽离后
2. 使用 webpack 自带的 SplitChunksPlugin 插件 split-chunks-plugin
module.exports = {
 optimization: {
    splitChunks: {
      cacheGroups: {
        commons: {
          test: /(react|react-dom)/,
          name: "vendors",
          chunks: "all"
        }
      }
    }
  }
};
打包 npm run build
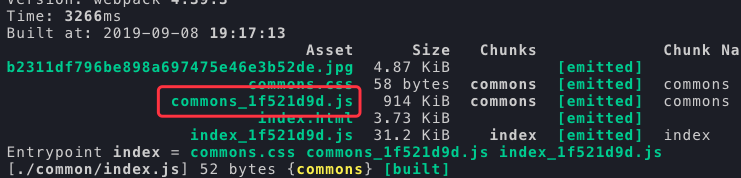
可以看到已经构建出来了
使用的话需要在 html 模板中 引入, 而且要改成多入口的模式
module.exports = {
  entry: {
    index: "./src/index.js" // 这里改成多入口
  },
  output: {
    path: path.join(__dirname, "dist"),
    filename: "[name]_[hash:8].js"
  },
  plugins: [
    new HtmlWebpackPlugin({
      template: path.join(__dirname, "index.html"),
      filename: "index.html",
      chunks: ["vendors", "index"] // 这里改成 chunks 引入
    }),
  ],
  optimization: {
    splitChunks: {
      cacheGroups: {
        commons: {
          test: /(react|react-dom)/,
          name: "vendors",
          chunks: "all"
        }
      }
    }
  },
};
打包

3. 抽离多次使用的公共方法, 依旧需要多入口的配置
module.exports = {
  entry: {
    index: "./src/index.js"
  },
  output: {
    path: path.join(__dirname, "dist"),
    filename: "[name]_[hash:8].js"
  },
  plugins: [
    new HtmlWebpackPlugin({
      template: path.join(__dirname, "index.html"),
      filename: "index.html",
      chunks: ["commons", "index"]
    }),
  ],
  optimization: {
    splitChunks: {
      minSize: 0,
      cacheGroups: {
        commons: {
          name: "commons",
          chunks: "all",
          minChunks: 1 // 某个方法至少引用了两次,才会单独抽离
        }
      }
    }
  },
};